Blood, Sweat, and Sawdust

Going against the grain

Category: Design

Designing a Farmhouse Table

Some good friends of mine recently commissioned a dining room table.  They wanted a rustic farmhouse table: the kind of table that dominates Pinterest and built from construction lumber.  I wanted to build them something better.  So, Here is what I came up with.

Farmhouse Table

I will make the table and bench top from black walnut.  Furthermore, both will have draw-bored bread-board ends.  The customer wants to paint the base.  So, I will build it from less expensive lumber: likely poplar or maple.  I will assemble the entire table using loose tenon joinery.

While drawing plans for the customer, I also provided them with several options for details such as the legs.  In the end the customer went with the third option.

In the end, I believe the design of the farmhouse table was a success.  I hit a compromise that both I and the customer are happy with.

Consequently, I went ahead and purchased the walnut.  In fact, I finished gluing up the main panel for the farmhouse table top last night.

Stay tuned.

Part 2 – Making the Top with Breadboard Ends

Part 3 – Building the Farmhouse Table Base


A Hand Tool Cabinet: Lumber Selection

Cherry Lumber

Work is slow on the tool cabinet.  However, I scored a good deal on the lumber for the project.  As a result, I now have 40 board foot of nice cherry.  The mill listed the lumber as 4/4.  However, the it’s all closer to 5/4.  Additionally, the boards are all straight, clear, and over 9-inches wide.

I cut all the boards to rough length, and thicknessed them to 1/8th-inch over final thickness.  Now, I will wait another week or so for the boards to acclimate.  Then, I will finishing milling them at start work on the case joinery.

I would love to use cherry plywood for the door panels.  However, I’m can’t find anything 1/2-inch thick.  It seems to be available in 3/4 only.  If I can’t source cherry plywood, I will use maple.  It’s easy to source in 1/2-inch, and should give some contrast once the cherry darkens.

If you know of an Atlanta area dealer that stocks 1/2-inch cherry plywood, let me know.  Thanks.

Check out my previous post on this project: The Mockup

You can also check out my next post here: A Hand Tool Cabinet: The Case

How to Use a Sector

The sector is an excellent tool for proportioning your furniture designs quickly and accurately.  Last week, I showed you how to make a sector from an old folding rule.  I also discussed how to use it.  Despite its simple nature, I thought this discussion could benefit from some visuals.

How to Use a Sector

Align the sector

1. Start by aligning the sector with the edges of the space you are dividing.  Since I am dividing the space into 4, equal segments, I align it with the number 8 mark.Align a divider with the sector

2. Next, without adjusting the sector, align a divider with the proper marks.  In this case, it is the number 2 mark.

IMG_5854

3. Next,  walk off your divisions with the divider.

IMG_5855

That’s it.  Four perfectly spaced divisions.  And, it only took a few seconds to complete.  No complicated math.  Simple.

If you have any questions, don’t hesitate to let me know in the comments.  Now, go out there and find yourself an old folding rule.


Make a Sector from an Old Folding Rule


The Sector

How do you quickly divide an interior space of 17 5/8 inches into three equal parts?  With a sector.  Furniture builders and architects have reached for the sector often to quickly divide spaces.  Unfortunately, it’s a tool that has been largely forgotten in today’s machine driven world.

The sector is nothing more than a pair of folding arms used to create a series of proportional triangles.  To divide a space, line up the sector with one of the markings that is a multiple of the division you want.  For example, if you want to divide the space into four equal parts, you could use the four, eight, twelve…you get the point.  Then, just set a pair of dividers to the division you want.  If you selected twelve, align your dividers with the three.  If this isn’t entirely clear, don’t worry.  I will write another post detailing their use.

IMG_5763

To make the sector, start by marking the center point of your hinge, where the inside of each arm intersect.  I used an accurate straightedge to carry a line through with a pencil.  It’s critical that this is accurate.

IMG_5764

Then, walk your increments off with a pair of dividers.  You may have to use some trial an error here.  Twelve increments works great, due to the amount of whole number ratios you can get.  Unfortunately, my first step would have still be in the brass, so I went with eight for this one.

IMG_5765

With the increments stepped off, I carefully carried a line across both arms with a marking knife.

Completed Sector

From there, it was just a matter of filling in the lines for visibility and numbering my graduations.  Stay tuned for part two, where I will demonstrate the sector in use.

Click here for part 2 in this series: How to use a sector

The Fundamentals of Furniture Design: Finding Inspiration

Design inspiration is all around you, awaiting discovery.  You just have to know where to look.  It often turns up where you least expect it.  You’ll find inspiration in nature.  You’ll find it in the designs of others.  Often, you’ll find inspiration in areas remotely related to furniture making.  Be careful not to design cheap copies.  A wise man once said, “originality is the art of carefully concealing your source”.  For example, borrow the proportions of a classic design and apply it to a modern one.  Take the moldings or ornamentation from your favorite piece of architecture and re-purpose it in your design.  Don’t leave any stone unturned.  Look everywhere for inspiration.

Nature never fails to provide design inspiration

Nature never fails to inspire

Nature

Inspiration is ripe in the natural world.  You can borrow forms from both the animal and plant kingdoms.  You can even take them from the microscopic world.

The spiral of a sea shell supplies inspiration for a table top.  The shape of a pine cone reveals itself in the shape of the finials on a bed post.  The natural world even influences the columns of the Corinthian classical order.  Don’t stop at the basic shapes on forms.  Nature also supplies ques for color, contrast, texture, and proportion.  Living things aren’t the only source of inspiration in the natural world.  Geology also supplies insight.

The Man-Made World

The men and women who came before us left design ques everywhere.  Once discovered, use them in your designs in new and creative ways..

If you like cars, recreate the curves of your favorite model in a table or chair.  Use the proportions of your favorite building in that chest of drawers you want to build.  Boats, airplanes, temples, city layouts, even kitchen appliances:  All great sources of inspiration for you next project.  It’s okay to take ques from the furniture others have made.  Just make sure that you keep it to an influence and avoid an outright copy.

Don’t forget to look past the shapes and forms you see.  Look for details and takes notes.

Finding Design Inspiration on the Web

There are countless sources of inspiration on the Internet.  A simple Google image search reveals page after page of material.  Pinterest is a great source of inspiration (if you haven’t already, sign up for a free account and follow some furniture makers).  There are countless design blogs to follow.  YouTube is also an excellent resource.

To summarize, inspiration is found in many places that the average designer fails to look.  Keep a notebook nearby and jot down anything that inspires you.

What is the most unusual source of inspiration you’ve seen used for a piece of furniture?

Fundamentals of Design: Series Index


The Fundamentals of Furniture Design: Proportion Part 2

Understanding that the traditional builder focused on proportional design instead of measurement isn’t helpful to the modern designer if we can’t see how he did it.  In this post, we will do just that.

Proportion has three primary objectives: to create symmetry, contrast, and punctuation.  Designers create symmetry in the horizontal: right-to-left.   Symmetry’s purpose is to lead the eye.  Contrast gives life to our designs.  Major and minor elements create harmony instead of competition.  Punctuation gives our designs a distinct beginning and end.  It creates transitions which connect the various elements of our design.

Proportional design creates harmony

Proportion creates harmony


The design above shows that we can use the knowledge the traditional designer provides even for the simple modern designs.  Despite the absence of ornamentation, the design borrows some ques from the classical orders.  A vertical 2:3 rectangle composes the basic form.  The vertical elements transition on a 1:7 scale.  The large scale on the right, dictates the size of the drawer.  The small scale to the left divides the leg into seven sections.  The bottommost section is where the leg taper begins.  The thickness of the other elements, as well as the overhang of the top, are all drawn from scales.  For example, the thickness of the legs is 1/3rd of one module on the right scale.  The drawer-pull placement is 1/3rd the height of the drawer.  The pull placement provides symmetry between right and left.  It drawers the eye to the drawer.  The overhand of the top and the taper of the leg both give contrast and punctuation.

More drama could be created by using contrasting materials.  More complex moldings could be used for the top.  Bands of inlay could be place around the legs at the transition lines.  The possibilities are great.

The important thing to consider is that this very simple design creates harmony between all its elements.  I created it in a very short amount of time with nothing more than a compass and straight edge.  However, it wasn’t my first effort…that was a complete failure.  Get out there and get started.  Don’t be afraid to fail.  Keep at it.  Study the proportions of successful designs.

Fundamentals of Design: Series Index


The Fundamentals of Furniture Design: Proportion Part 1

Prior to the Industrial Revolution, furniture design and creation were intimately connected.  Furniture makers used whole number proportions to create harmony between their work, nature, and the human form.  Like a symphony, proportion created balance between the micro and the macro.  Unfortunately, the Industrial Revolution shifted priorities.  As machines replaced our hands and eyes, measurements and tolerances replaced proportion and harmony.

Proportion starts with the square and ends with the double square

Proportion starts with the square and ends with the double square

Traditional designers strove for connectedness.  Simple shapes with whole number proportions combine to create complex forms.  Details echo proportions found in the larger form.  This creates a sense of balance between scales.  In the image above, the square proceeds to the double-square, much like a musical octave.  The middle transition creates a 2 to 3 ratio.  With nothing more than a compass and a straightedge, I am able to create any proportion or shape my heart desires; no tape measure or ruler necessary.

You don’t have to stick to traditional in order to create harmony in your designs.

The golden ratio (phi) is found throughout nature.

The golden ratio (phi) is found throughout nature.

The shape above represents the golden rectangle (phi).  While, technically not a whole number ratio, phi (1.61803…) can also be represented by the Fibonacci sequence.  As you progress higher in the sequence, the closer the ratios approach phi (i.e., 89:144 = .61805).  This golden ratio is found everywhere from the spiral of sea shells to the pyramids of Giza.  Designers often turn to golden ratio because it pleasing to the eye.

The Doric classic order

The Doric classic order

The traditional designer spent large amounts of time studying the classical orders.  Above, the Doric order epitomizes the height of classic Greek design.  Often seen without a base, the column height varied from 4 to 8 column diameters.   In this example, the capitals are 1/2 diameter high and 1 1/2 diameters wide.  The classical orders are similar to the keys of classical music.  Each speaks a slightly different language, but each strives to harmonize its elements.  Studying the classical orders can go a long ways in teaching a designer which proportions create balance and harmony.

Take a minute and study a piece of furniture that you find attractive.  What relationships can you find between its height and width?  Do the details echo elements found in the larger form?  What shapes can you find hidden in the overall form?  Repeat the same process with a piece of furniture that you find clumsy or clunky.

Fundamentals of Design: Series Index

The Fundamentals of Furniture Design: The Furniture Design Toolkit

Toolkit Web

What you keep in your furniture design toolkit is a personal choice.  I intend to give you tools that can expand your design experience; not tell you which ones to use or how.

There are two distinct approaches to design: digital and analog.  You can use either effectively.  You can do as I do, and use a combination.  I draw my rough sketches on paper, and polish my designs in Sketchup.  It’s nice to see your designs in three dimensions.  It helps me workout functional issues that are difficult to see on paper.

The Analog Toolkit

I prefer to start my designs with pencil and paper.  I freehand a rough sketch to capture the basic form.  Then, I refine the form with a straightedge and compass to produce a 3-view orthographic projection.  While I complete my designs digitally, you are free to finish them on paper.  If you prefer the analog route, there are some tools you’ll want to keep nearby.

Paper and pencil are obvious.  I prefer a sharp #2 and a spiral bound notebook for my rough sketches.  For my 3-view drawing, I like a 16-20lb paper and a set of Draft-Matic mechanical pencils.  You’re free to use whatever pencils you like, but make sure you keep them sharp.  You’ll also want a soft white eraser, eraser shield, and dust brush (don’t use your hands).

You can create any shape with no more than a straightedge and compass, but that takes skill; something we will dive into later (there are excellent exercises in Sacred Geometry: Philosophy and Practice).  However, it’s nice to have a few angle templates and a T-Square.  You’ll also want a compass and at least one divider.  A set a French Curves are nice to have.  You can typically find a complete set for around $10.  If you really want to splurge you can purchase a parallel sliding rule (I plan to purchase one soon).

The Digital Toolkit

If you prefer digital, then you’ll need to get acquainted with some 3D modeling software.  SketchUp is what I use.  It’s free and easy, but there are license restrictions.  There are many others, but you’ll find the Sketchup’s community is growing very quickly.

Whatever you use, get familiar with software as quickly as possible.  Buy a few training books.  Search Google.  Look for resources on YouTube.  Rob Cameron has a great website if you’re using Sketchup: SketchUp for Woodworkers.

Whether you decide to go analog, digital, or both, get out there and start practicing.

Next up, Proportion.  Stay tuned.

Fundamentals of Design: Series Index

Fundamentals of Furniture Design: What is Good Design?

Good design doesn't have to be complex

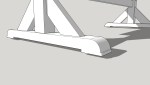
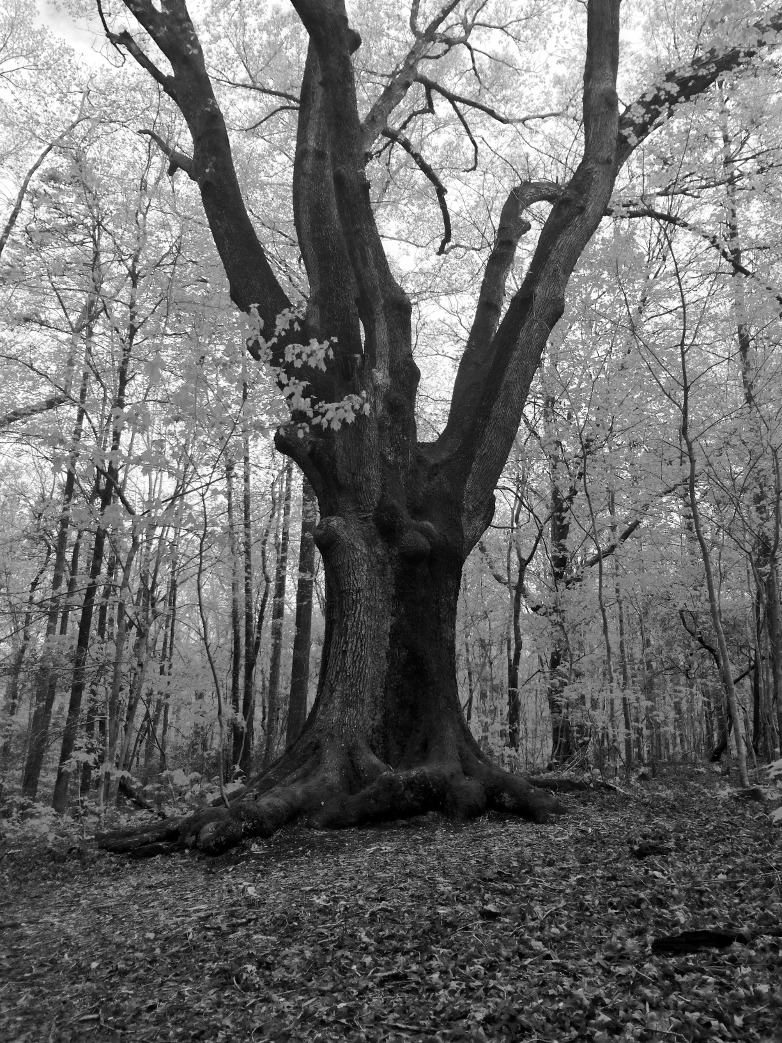
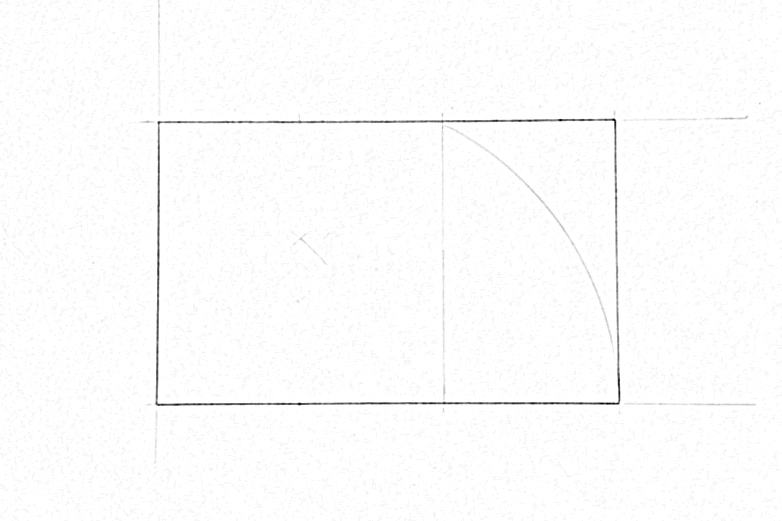
This simple design, uses many proportions commonly found in nature

Good designs are often beautiful but, design is so much more than that.  A well designed piece of furniture is not only beautiful, it is also functional.  It serves a purpose and serves it well.  The best designs are unique and establish style.  In this post, we will look at the elements of good design and examine them in detail.

Beauty

“You can’t please all of the readers all of the time; you can’t please even some of the readers all of the time, but you really ought to try to please at least some of the readers some of the time” – Stephen King, On Writing

I really love this quote, and I think it applies here.  Beauty is a very personal thing.  I can’t tell you what that means but, if you’re the only one who finds your designs beautiful, you aren’t succeeding as a designer.

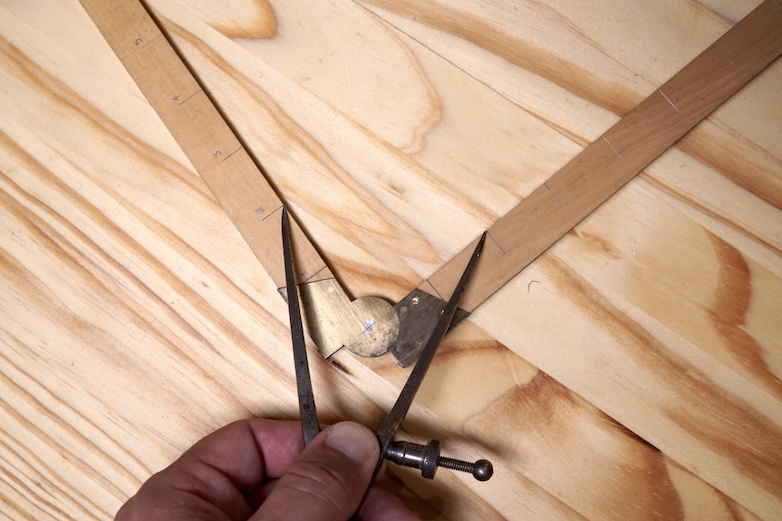
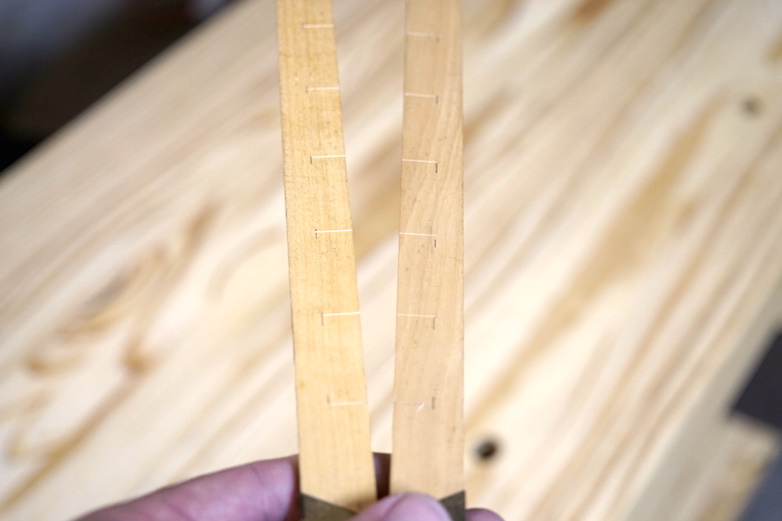
Good designs tend to have elements commonly found in nature.  The most revealing thing you can do, is examine a piece that you find beautiful.  Break every element down and look at it under a microscope.  Look at the proportions.  What textures are used?  How did the designer incorporate negative space?  What about color?  Can you find a relationship between any of these elements and those found in nature?  What is it about each element that you find attractive?

If you want to design successfully, the examination process is critical.  Do it every day.  Take notes.

Form

Webster’s describes form as, “the shape of a thing or person”.  The elements of form include, but are no limited to: shape, negative space, color, texture, size, and density.  Good form seeks to find balance or display contrast.  Your design will determine the shape, size, density, and negative space.  Wood selection and finish will determine color and texture.

When inspecting the elements of your design, you must ask yourself if it achieves your goal.  Do the proportions of the legs achieve balance with the thickness of the top?  Does the contrast between wood species create the desired effect, or is it too busy?  Try to recreate the elements you find attractive in other pieces.

Function

Furniture without function is useless.  It doesn’t matter how aesthetically pleasing the item is.  Function is the most important factor in determining the success of design.  Seek to make your designs functional before making them beautiful

When building a dining table, make sure that it is the proper height.  When designing a chair, make sure that it is sturdy and comfortable.  Do your drawers slide freely?  Will doors open properly?  You get the idea.  It’s not rocket science, but you must not overlook anything that may hinder the design’s purpose.

Don’t forget the details.  Groves and seams in tabletops are notorious for hiding crumbs.  Dark woods and stains show dust.  Soft woods scratch easily.  Be thorough.

Style

Style is the most personal element.  It sets your designs apart from the others.  It makes your designs unique.  It’s also the element that takes the most time to develop.

Establishing style can be as simple as incorporating a unique detail into all of your pieces.  Perhaps it’s a molding or drawer pull.  It can be subtle, such as consistent use of negative space.  It can be bold, like the sculpted chairs of Sam Maloof.  Whatever it is, it’s likely something that will take some digging to get out.  You won’t uncover it over night.  Keep working.  Keep discovering what it is that makes you unique.  Look for inspiration everywhere.

What do you think makes a design successful?

Next up, we’ll look at the designers toolkit.

Fundamentals of Design: Series Index


Fundamentals of Furniture Design: Series Introduction

The Fundamentals of Furniture Design stats with the right tools

The Fundamentals of Furniture Design stats with the right tools

Over the next weeks, I will write a multi-part series on the fundamentals of furniture design. This subject is new to me, but I have done my research. Think of it not as instruction, but more as an open discussion.  I believe there is a lot we can all learn along the way.  Besides, who doesn’t want to design beautiful, unique furniture from the ground up?

I will write at least one post per week and cover the following subjects:

  1. What is Good Design?
  2. The Design Toolkit
  3. Proportion – Part 1
  4. Proportion – Part 2
  5. Resources and Inspiration
  6. Why Certain Designs Work and Others Don’t
  7. Design Your First Piece
  8. Generating Ideas
  9. Refining Ideas
  10. Prototyping
  11. The Build
  12. Build Evaluation
  13. The Details

It is highly likely that I will add a few more posts to this series as I go, but these are the major topics I would like to cover.  If there is anything else you would like for me to discuss along the topic of design, let me know.  I will try my best to cover it.  By the time we finish, you will be well on your way to designing your own pieces.  Your friends will ask where you got the plans, and you can tell them, “I designed it myself”.

I’m very excited to begin this series, and I hope that you will join me.  Stay tuned!