Blood, Sweat, and Sawdust

Going against the grain

Category: Jigs

Improving the Porter Cable Drill Press

The 15-inch Porter Cable drill press is an excellent value.  It’s cheap, accurate, and powerful.  However, it has one huge drawback for the woodworker: the table.  It sucks!  As a result, I made an auxiliary table to help me get the most out of this tool.

Unfortunately, there isn’t a lot of information on making an auxiliary table for this model.  So, I inspected the drill press and came up with a game plan.

Porter Cable Drill Press Table

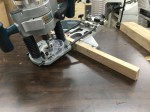
My design consists of two sandwiched pieces of melamine, and oak edge banding.  It also has a slot in the middle for replaceable inserts.  Finally, it has t-tracks for a fence and hold-down.  I used a plunge router to create the slot and a dado stack to fit the t-tracks.  Easy stuff.  The hard part is mounting the new table to the existing one.

Ultimately, I decided to mount the auxiliary table using two hex bolts.  The bolt heads are countersunk to keep the surface obstruction free.  Since the existing table doesn’t have mounting holes, I drilled them myself.  This was easier than I anticipated.  As a result, the table is easy to remove and adjust.

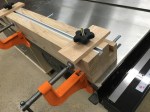
I built the fence from scrap melamine.  The fence attaches to the table with star-knobs and bolts.  I also added a hold-down.  Now, I no longer have to hold my work-piece with my bare hand.  Yay safety!

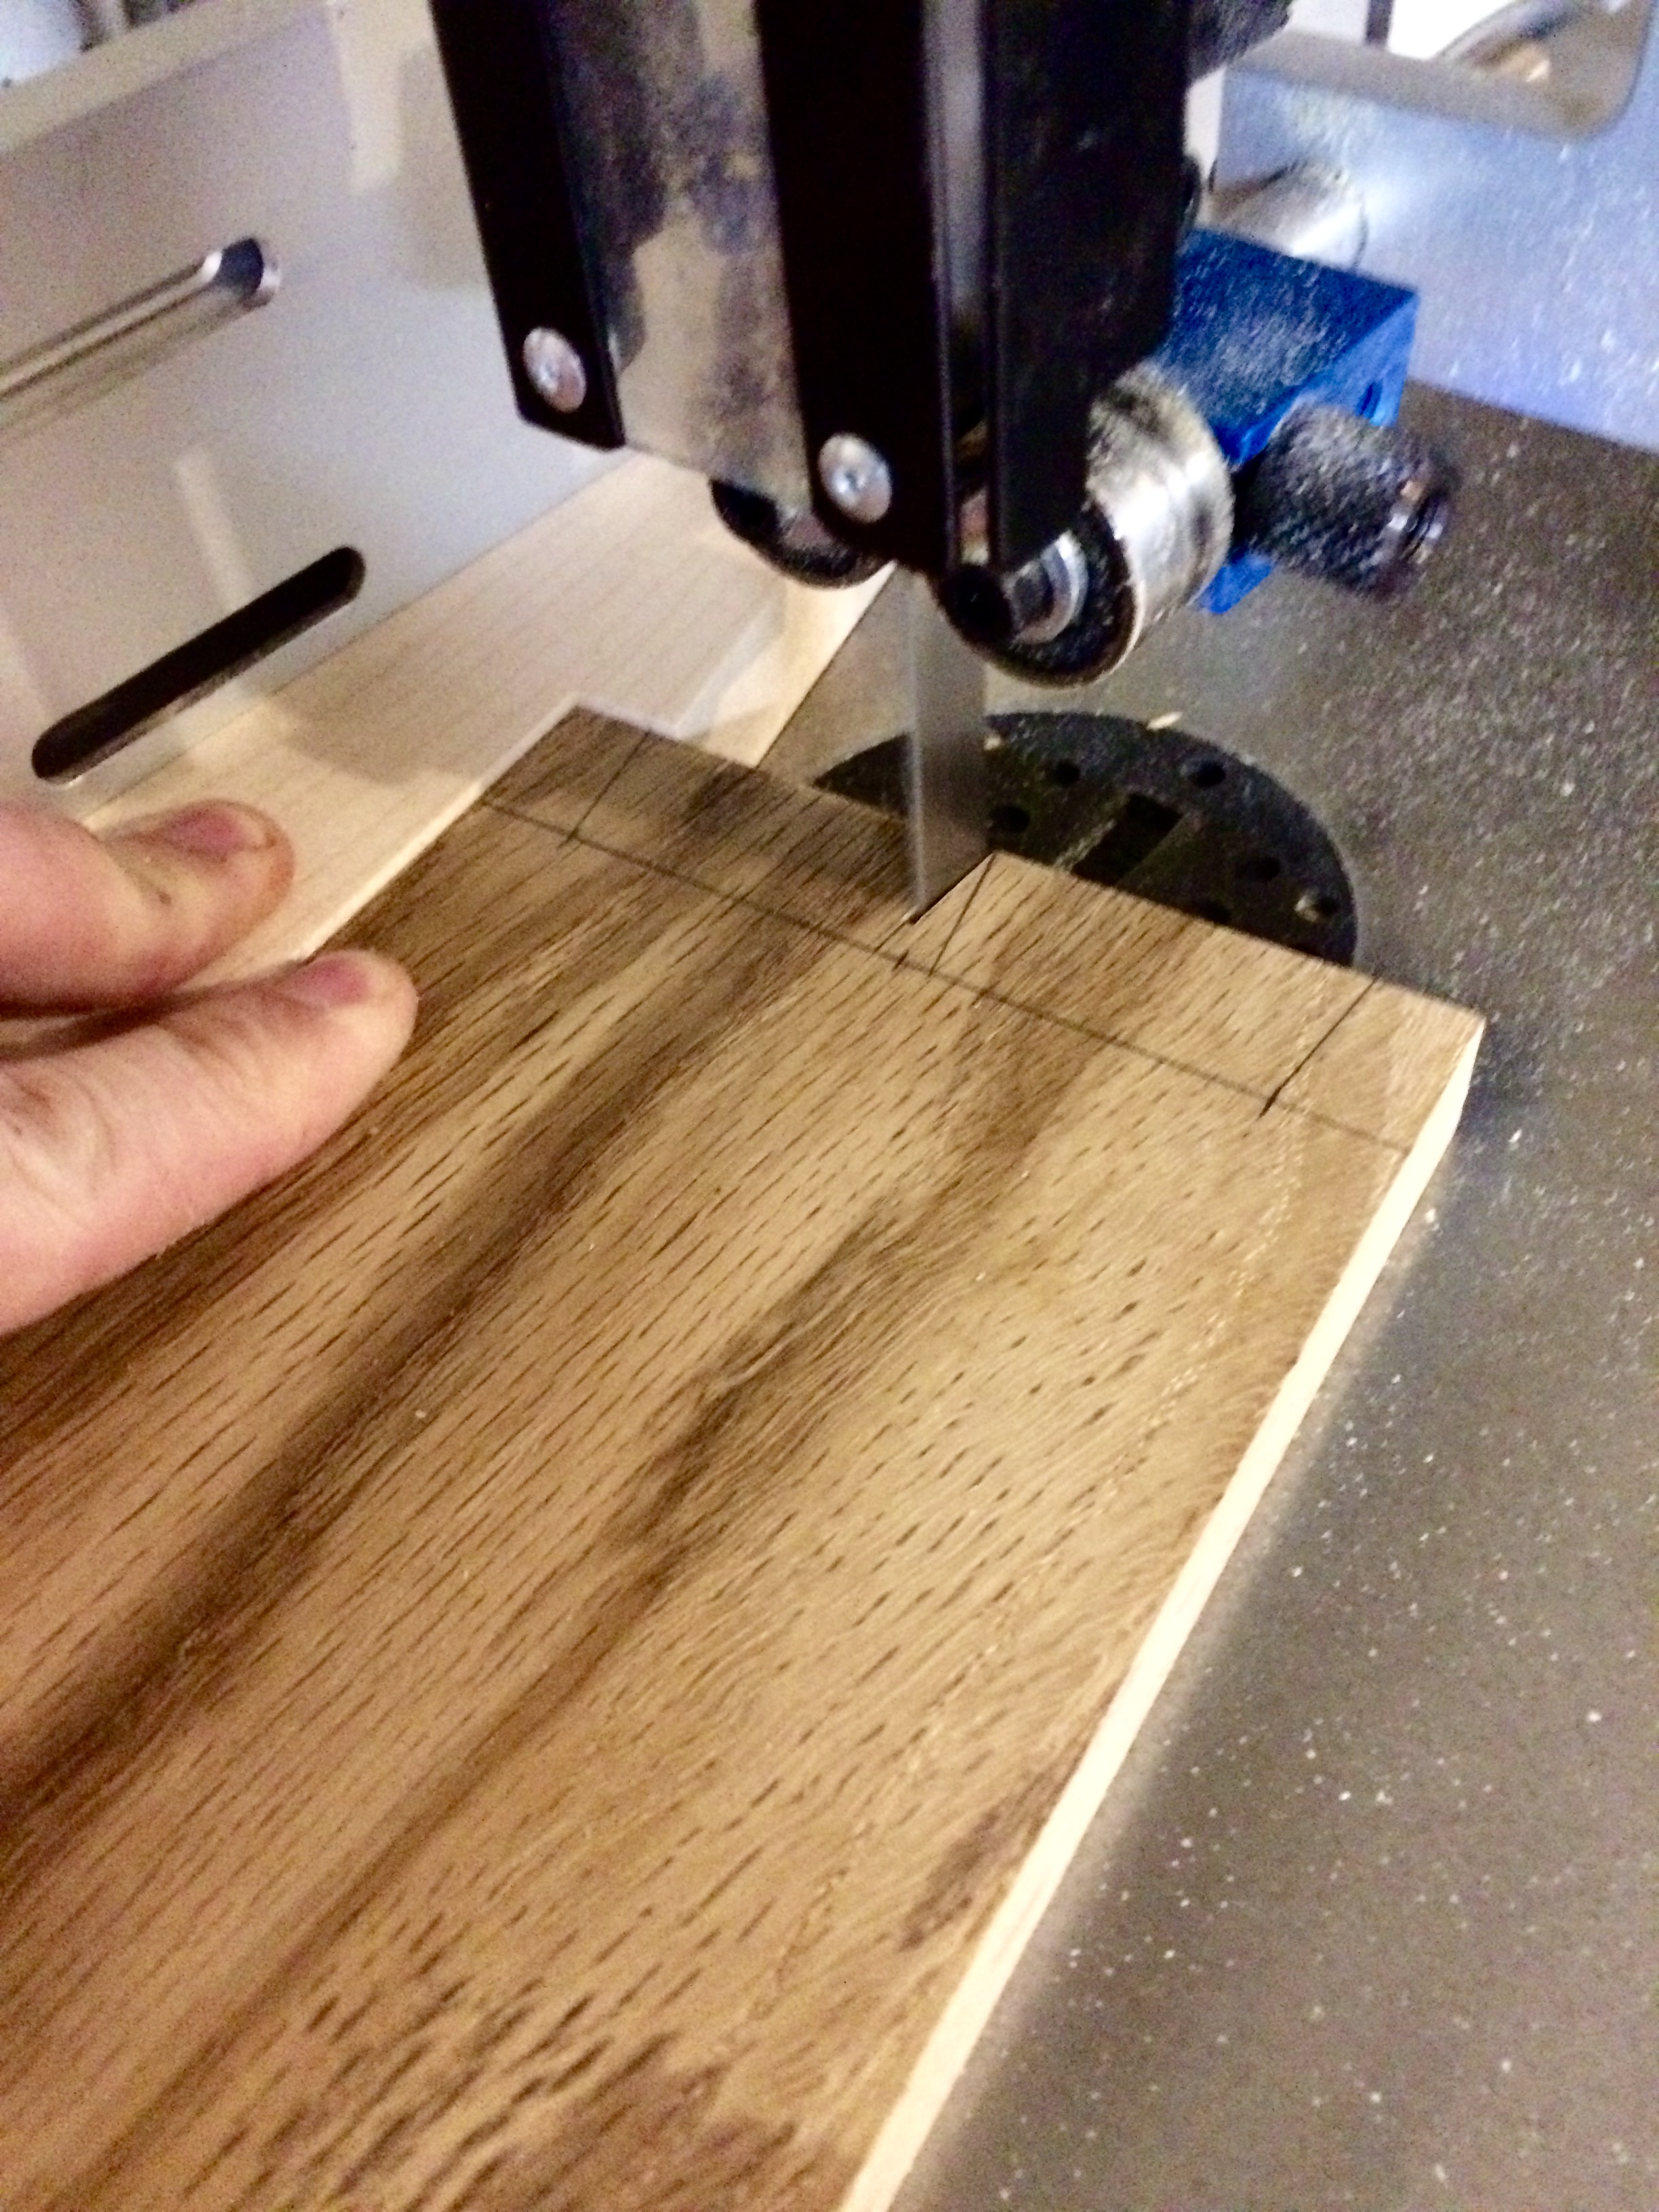
While still in the workshop, I made about 15 zero clearance inserts.  I cut these from the same material as the top.  As a result, they sit perfectly flush.  Hopefully, I won’t have to make any more for some time.

The new table presents a big improvement to the Porter Cable drill press.  So far, my only concern is the height of the fence on the right.  With smaller material, the drill-press handles may interfere with the fence.  If this becomes and issue, I’ll just cut a notch in the fence.


The Mortise Jig

The Idea

Above everything, I want to create beautiful and unique furniture.  The furniture which draws my attention has a common theme: mortise and tenon joinery.  Ideally, I would create mortises with a dedicated hollow-chisel mortiser.  Unfortunately, I don’t have the space or funds available for such a wonderful tool.  As a result, I have determined that my best course of action is to use the plunge router for mortising.

To improve speed and accuracy, I followed Jeff Miller’s advice and built mortise jig.  I followed Jeff’s design fairly closely, but made some minor improvements to the original plan.  For example, I added a t-track and adjustable stop blocks for better repeat-ability.

The Design

The jig is simple in design and easy to make.  It consists of a platform, a track, and a pair of hold-down clamps.  I milled an auxiliary fence for my router at the same time I milled the parts for the track.  This ensures a perfect fit to guide the router.

A 8/4 white oak board with too many knots for furniture sat on my lumber rack.  It had just enough straight grain to mill up the parts for the jig.  I laminated two pieces to make the platform.  Then, I cut a dado for the t-track.  I built the guide by resawing another strip of oak.  The resawed pieces produced three 3/4-inch strips: two for the guide and one for the auxiliary fence.

I glued the guide pieces together.  However, I did not permanently attach the guide to the base.  It attaches using 3/8-inch bolts that are also used to secure the hold-down clamps.  This allows me to replace the track if it wears out over time.

The Results

I eased the sharp edges with a block plane, and applied paste wax to the fence.  So far, the jig works extremely well.  I plan to use it on a few projects that I have coming up.  Stay tuned.


A Simple Trick for Boring Accurate Holes by Hand.

I’ve always struggled boring accurate holes with hand tools.  I’ve tried using the “CD trick”.  I tried try-squares and mirrors.  I get close, but sometimes close isn’t good enough.  That’s when I came up with this simple trick (I’m sure I wasn’t the first one to use it): a guide block.

I first came up with this while drilling the draw-bore holes through the side of my top.  I have a drill press, but there was no way I could get the bench-top under the press.  Now, I’m using it to start my holdfast holes.

auger bit with guide block

Here’s how I made it:

  1. Find a piece of scrap that’s at least twice as thick as your hole and long enough to accept a clamp on either side of the hole.
  2. Joint an edge.  This will be the bottom of your guide.
  3. With the jointed edge down, bore your hole roughly through the middle of the opposite edge on a drill press (the table must be square to the bit).

You’re done.  I marked arrows on all four sides of mine to remind me which way to orient the guide.  A wider piece will yield more accurate holes, but may be harder to clamp to your work piece.

Crisp hole with bit and brace


The Tale of the Tail Jig

Jig1My handsaw skills might be lacking, but I do enjoy cutting most of my joinery by hand. However, when I have a bunch of identical joints to cut, I turn to jigs.

I recently discovered this little jig for cutting tails on the bandsaw. It’s little more than a wedge with a stop at one end. To make it, you simply cut a wedge to your desired angle, cut off the tip, flip it around and glue it back on. To use it, you register your board on the stop and slide the opposite edge along the fence of your bandsaw.

Jig2

The beauty of this jig is that you can make several cuts without adjusting your fence. Start by marking out your tails on  one end of your board.  Using the jig, adjust the fence of your bandsaw to line up with your first cut. Assuming your tails are symmetrical, you should be able to take two cuts from each end of your board. You end up only needing to adjust the fence once for each tail you’re cutting.  Dead square tails are just icing on the cake.

What jigs do you use to supplement your handtool work?

My First Shot at Template Routing

securedownload2

I recently tried my hand a template routing for the first time. I knew I should have listened to that little voice in my head that was telling me to send a test piece through before my work piece. I ruined my work piece as a result of my reluctance and had to start over. Fortunately, I had plenty of spare wood and it didn’t take me very long to get back to where I was.  Here is what I learned from my experience:

1) When you initially cut your piece out (whether with bandsaw or jigsaw), cut as close to the line as possible. The more space you have between the edge of your template and your bit, the more likely you are to experience chip out.

2) Like with most other tools, cut with the grain, not against it.  This will typically mean that you need to cut down the curve. You may need to flip the work piece at some point.

3) If using tape to secure your work piece to the template, make sure that it’s secure. This is where I really went wrong. While cutting the arms for a pair of Adirondack chairs, my double-sided tape began to slip. This allowed my work piece to be pulled into the bit.  This is the result:

securedownload1

Warm Weather Means Outdoor Furniture

It’s getting warm, which means I’ll likely be building lots of outdoor furniture. Here I’m using Cypress to build a pair of Adirondack chairs for a new customer. They will be based off of Norm Abram’s classic design, but differ in a few key details. This time I will be using a template on a router table to cut all of my curved pieces to size. I hope that this will speed up the build process. Once all of the parts are cut to size, I will assemble the chairs with stainless hardware and an exterior wood glue. I will finish them with Epifane’s Clear Varnish. This should help them to hold up to the elements for decades.

photo 1

Cypress is great for outdoor furniture.  It’s naturally bug and rot resistant, and it’s also light weight.  My first pair of Adirondack chairs have been sitting in the backyard for about a year now.  They are in direct contact with the wet ground, and in full sunlight.  Despite being unfinished, they show now signs of giving up.

photo 2

I created a template out of mdf (left).  I will use it to cut the rough sawn pieces (right) to final dimensions.  This will ensure that all pieces are uniform and greatly speed the build process.

Traditional Sawbench

When began my journey with hand-tools, I thought it would be prudent to invest in some panel saws. I purchased a couple on eBay, and set out to get them as sharp as I could. Unfortunately, my two beautiful pre-war Disston’s have hung on the wall ever since. I thought I had my saws reasonably sharp, but always struggled cutting anything harder than pine. It wasn’t until I decided to build a traditional saw-bench, that I found the answer to my problems.

Building the saw bench was rather straight forward. I broke down my stock to rough dimensions using my bandsaw. Then I milled the rough boards to final dimensions with my trusty Stanley no. 5. The joinery was accomplished with a few simple half laps and bridle joints. The bench was then assembled with Tight Bond III and some cut nails. It wasn’t until I used the bench for the first time that I discovered just how magical good ergonomics could be.

The saw bench is a marvel. It puts the work at knee height, so that you can use your body weight to hold the piece in place. It puts your body in proper alignment so you get good leverage and can track a straight line. Additionally, it’s much easier to track to a straight, square line with the saw plate hanging downwards. It’s amazing how much easier the saw seems to cut.

Never underestimate the power of ergonomics when it comes to using your hand tools. As a result of my recent enlightenment, I have decided to rethink just about everything in my shop. I chopped an additional 3 inches from the height of my work bench and am considering going even lower.

Use a Batten when Face Planing

I picked up this little gem from The English Woodwoorker. When face planing, use a thin batten with a notch cut into it to hold the corner of your work piece. The batten should be held diagonally by a clamp or hold fast. This will secure your work piece when you plane diagonally and cross grain. No need for an end vise.

20130929-161541.jpg

Tip: it helps to have a bench dog engage the piece at the opposite corner. This will act as a pivot point to engage the batten.

Time to unwind

Beautiful furniture requires accurate joinery, and that accuracy requires square boards which are free of twist. Even small amounts of twist can wreak havoc with forming solid joints. To detect these minute amounts of warpage, a tool is needed. The tool most often employed is the winding stick. Winding sticks are nothing more than a pair of long straight sticks that are laid across each end of a board to amplify any existing twist to the eye.

I made mine out of hickory, because it is a very hard wood with straight grain. Each one is approximately 18 inches long, with a pair of holes on one board to make sighting any twist a bit easier. I also chamfered the tops of each board to remind me that I only need to maintain one side. I finished them with a couple of coats of tongue oil.

20130917-200221.jpg

Bench Hook Complete

20130914-130437.jpg

Using hand-cut dadoes for my first bench hook may have been a little overly ambitious. However, it was an excellent opportunity to build skills, and I am pleased with the results. It definitely makes finish quality crosscuts much easier. The biggest lesson learned was to make your crosscuts as close to final dimensions as possible. Squaring up large areas of end grain with a block plane is not fun.