Blood, Sweat, and Sawdust

Going against the grain

Where did I put that Chisel?

One of the biggest hurdles I’ve faced in my small garage shop is finding where I’ve left things.  My second biggest hurdle is clearing the clutter off my workbench while working on a project.  Needless to say, the solution was something that goes against my very nature.  You see, I’m not a very organized person.  However, I believe one of the keys to experiencing joy in the workshop is having everything in its proper place, and having everything within easy reach.

So, I set on what I believed would be a long and frustrating journey to get my shop organized.  I was immediately pointed towards Tom Clark’s Practical Shop Cabinets.  What I learned reading his book was nothing short of miraculous.  I didn’t have to spent months getting organized.  Neither did I have to spend a small fortune.  All that was needed was a few tools and some inexpensive birch plywood.  

The construction methods Tom lays out are easy to learn and provide for very sturdy cabinets.   He lays out a few simple plans and provides you with the knowledge to design cabinets that match your specific needs.  I decided to start with a small sharpening station on casters.  In the future, I plan to make a miter station with several banks of drawers and a mobile assembly table.  If you have ever wanted to make your own custom shop cabinets, I highly recommend his book.  It will you the confidence you need to get started.  

Check back for updates.

20140308-092850.jpg
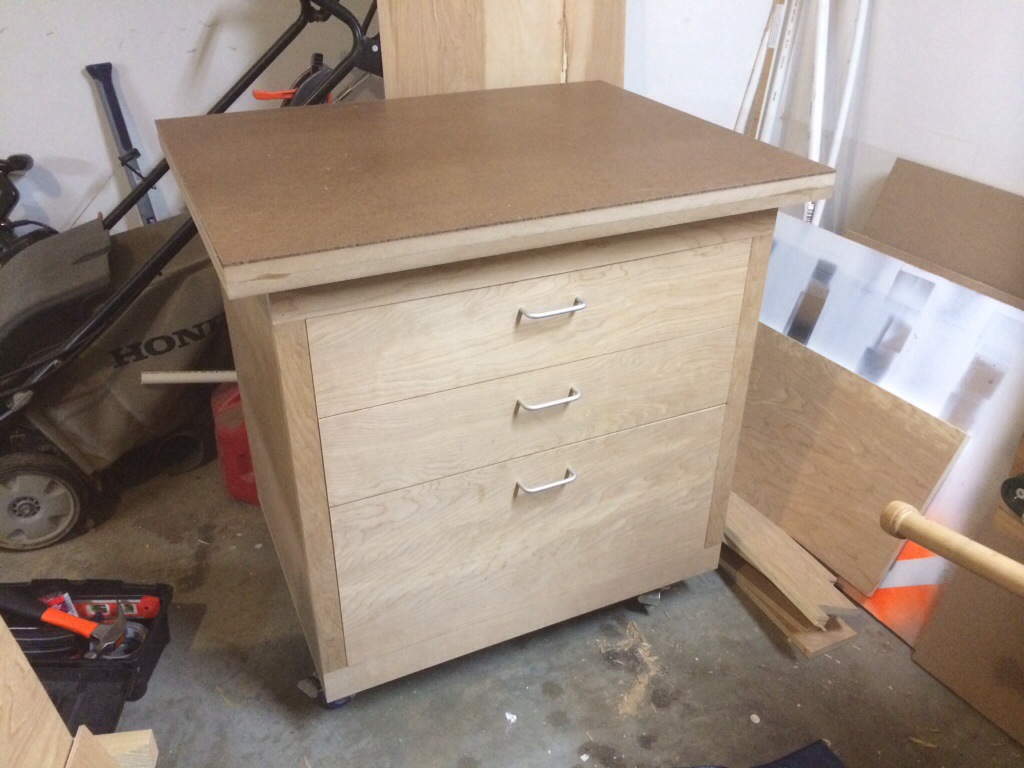
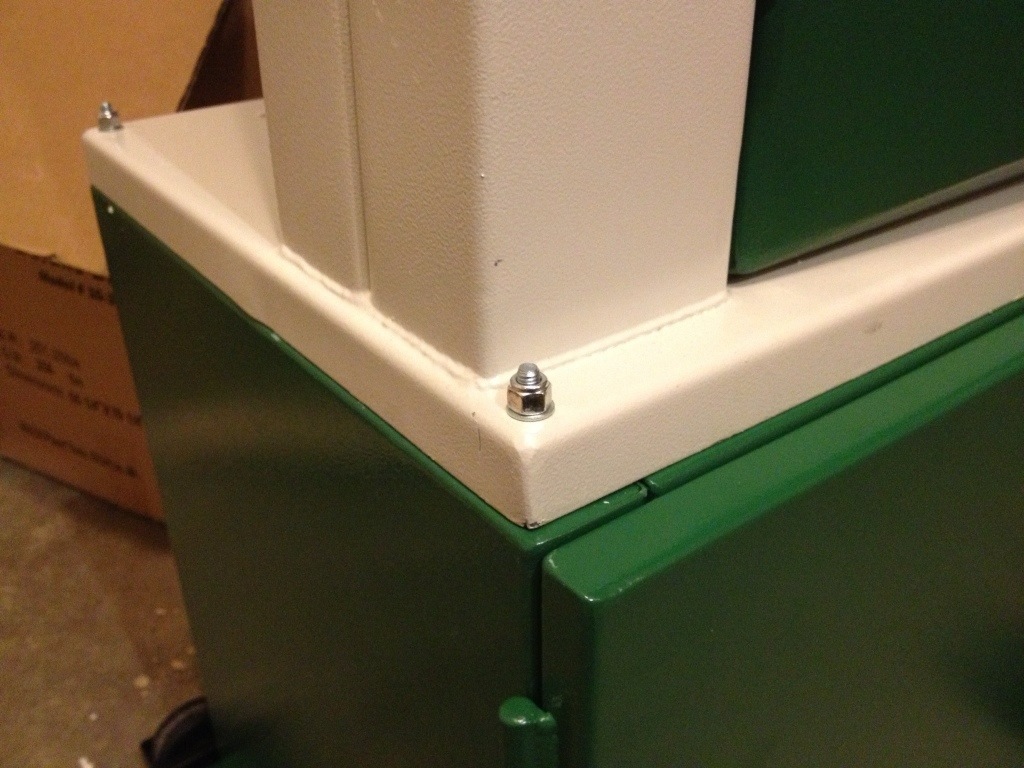
Here is my nearly finished sharpening station.

20140308-092859.jpg
This is another mobile cart I’m working on for my miter saw.

Children’s Foot Stool

My wife recently informed me that our two year-old son was in need of a small foot stool to help him learn how to brush his teeth.  I took this as an opportunity to practice a few skills I haven’t yet mastered.  I decided to make the stool from soft-maple.  I used a very simple design and focused on the joinery.  The legs attach to the top via hand-cut dados, and the legs are connected via a stretcher that uses mortise and tenon joinery.  This was my first attempt at through mortises.  The results were sufficient but could have been cleaner.  I would have preferred a shellac finish, but my wife insisted on painting the stool to match the bathroom.  I think it turned out great.


photo 1


photo 4

Traditional Sawbench

When began my journey with hand-tools, I thought it would be prudent to invest in some panel saws. I purchased a couple on eBay, and set out to get them as sharp as I could. Unfortunately, my two beautiful pre-war Disston’s have hung on the wall ever since. I thought I had my saws reasonably sharp, but always struggled cutting anything harder than pine. It wasn’t until I decided to build a traditional saw-bench, that I found the answer to my problems.

Building the saw bench was rather straight forward. I broke down my stock to rough dimensions using my bandsaw. Then I milled the rough boards to final dimensions with my trusty Stanley no. 5. The joinery was accomplished with a few simple half laps and bridle joints. The bench was then assembled with Tight Bond III and some cut nails. It wasn’t until I used the bench for the first time that I discovered just how magical good ergonomics could be.

The saw bench is a marvel. It puts the work at knee height, so that you can use your body weight to hold the piece in place. It puts your body in proper alignment so you get good leverage and can track a straight line. Additionally, it’s much easier to track to a straight, square line with the saw plate hanging downwards. It’s amazing how much easier the saw seems to cut.

Never underestimate the power of ergonomics when it comes to using your hand tools. As a result of my recent enlightenment, I have decided to rethink just about everything in my shop. I chopped an additional 3 inches from the height of my work bench and am considering going even lower.

Hand Plane Tune-up

Due to a limited budget, I started my hand tool journey by refurbishing some old tools.  Among these, was an old Stanley no. 5C that I received from my grandfather.  Despite finding it on the side of the road, it was still in relatively good condition.  It had lots of surface rust, but the sole was reasonably straight, so I decided to give it a shot.

After an initial tune up, I put it to work against some pine.  I was astonished at how well it cut.  However, my excitement was short lived.  Putting it to work on an oak board revealed just how inadequate my restoration had been.  The blade would jam, jump, and skitter across the board.   I was determined to figure out where I had gone wrong.

I scoured the Internet for solutions.  I fully disassembled the plane, and checked every part for possible defects.  It seemed as though I found something wrong with every part.  I fiddled and fiddled, until the tool performed flawlessly.  It was a frustrating journey, but wisdom was gained from the experience.

If you’re having issues with the performance of your plane, don’t overlook the following:

1) Is the sole truly flat?  Mine would rock slightly on a flat surface.
2) Are there any gaps between the blade and cap iron?  Hone the cap iron.  Play with the distance.  Make sure the nut is as tight as you can get it.
3) How cleanly does the lever cap mate?  Is it tight enough?  Hone the lever cap
4) How sharp is the blade?  Can it easily shave the hair off the back of your arm?  If not, work on your sharpening.
5) Is the face of the frog flat?  Flatten it.  Does it rock in the sole with the screws backed off?  Check all four corners
6) Are the totes tight?  Back off the short screw in the rear tote.  Does is wobble?  I had to cut some threads off the long screw.

Don’t leave any stone unturned, and don’t give up.  Happy planing.

Adirondack Chairs

Things have been quiet here for the last few weeks.  I fully intend to update this blog on a more regular basis, but I’ve been working on the design of my Adirondack chairs.  They are heavily influenced by the design Norm Abrams used in the New Yankee Workshop.  I have made a few changes to the design, and plan on making a few more on subsequent chairs.  While they don’t rely on any traditional joinery, they were still a lot of fun to make.  This pair was made entirely from Cypress, using stainless steel hardware.  All of the screws will be hidden by wooden plugs.  Overall, I am very pleased with the design.  The chairs look great and are very comfortable.  It’s too bad the weather’s starting to get cold.

photo

Use a Batten when Face Planing

I picked up this little gem from The English Woodwoorker. When face planing, use a thin batten with a notch cut into it to hold the corner of your work piece. The batten should be held diagonally by a clamp or hold fast. This will secure your work piece when you plane diagonally and cross grain. No need for an end vise.

20130929-161541.jpg

Tip: it helps to have a bench dog engage the piece at the opposite corner. This will act as a pivot point to engage the batten.

Time to unwind

Beautiful furniture requires accurate joinery, and that accuracy requires square boards which are free of twist. Even small amounts of twist can wreak havoc with forming solid joints. To detect these minute amounts of warpage, a tool is needed. The tool most often employed is the winding stick. Winding sticks are nothing more than a pair of long straight sticks that are laid across each end of a board to amplify any existing twist to the eye.

I made mine out of hickory, because it is a very hard wood with straight grain. Each one is approximately 18 inches long, with a pair of holes on one board to make sighting any twist a bit easier. I also chamfered the tops of each board to remind me that I only need to maintain one side. I finished them with a couple of coats of tongue oil.

20130917-200221.jpg

Bench Hook Complete

20130914-130437.jpg

Using hand-cut dadoes for my first bench hook may have been a little overly ambitious. However, it was an excellent opportunity to build skills, and I am pleased with the results. It definitely makes finish quality crosscuts much easier. The biggest lesson learned was to make your crosscuts as close to final dimensions as possible. Squaring up large areas of end grain with a block plane is not fun.

Making Stopped Dadoes by Hand

I decided to attempt this for my bench hook after watching Roy Underhill make a stopped sliding-dovetail on an old episode of the Woodwright Shop.  On the show, he mentioned that the same basic principles also applied to stopped dadoes.  You start like you would with any other dado, by marking out all of your lines.  The difference here is that you chisel a small mortise where your dado stops.  This gives your saw a place to go when you are sawing down your walls.

photo 2

Here is a picture for illustration.  My dado is 3/4″ wide and 1/4″ deep.  It stops about 3/4″ from the edge of the board.  My widest mortise chisel is only about 3/8″, so I had to make several passes to width.  I made the mortise slightly deeper than 1/4″, so that I could ensure that my saw made it to the proper depth.  In the end it won’t really matter, as this won’t be seen.

photo 3

Once you’ve made your mortise, it’s simply a matter of sawing to your line, chiseling out the waste, and then progressing to final depth with router plane.  If you don’t a router plane, a chisel could used for the entire process.

New Toy: Rikon 10-325 Bandsaw

After months of deliberation and daydreaming, I finally picked up my first bandsaw. I chose the Rikon 10-325 bandsaw for several reasons. There is a dealer near by (Highland Hardware). It meets all of my current needs. It seems to be well liked by the community. And, it has a 5 year warranty. I spent much of the weekend assembling the saw, but haven’t yet been able to start her up. The instructions are somewhat lacking, but assembly was rather straight forward.

20130904-170320This is the box in which the saw arrives.


20130904-170440Here are the contents, after opening the box.


20130904-170540

You first assemble the base, fastening the supplied bolts hand-tight. I choose to use a mobile base that I picked up from Wood Craft. I placed the assembled saw base on the mobile base before things got too heavy. Unfortunately, it slipped my mind to take photos of this step.

You’ll definitely need a friend to lift the saw onto the base. The instructions weren’t very clear on how to mount the saw to the base. Rikon supplies four bolts, each with a hex nut, nylon locking nut, two large washers and a small washer. After consulting Dr. Google, I decided to install the bolts from below the base in the following order: bolt, large washer, base, larger washer, hex nut, saw, small washer, nylon nut.

20130904-170823

Here is a close up of the bolt installation.

Rikon 10-325 Bandsaw

The rest of the assembly is pretty simple. You simply install the table using four hex bolts, and then install all of the accessories. I still need to level the table and set the blade tracking. I plan to have a full review sometime in the following weeks.