
Making the Farmhouse Table Base
The client wanted the farmhouse table base painted white. As a result, I didn’t feel that expensive lumber was necessary. However, I didn’t want to deliver them something made from construction lumber. After some contemplation, I decided on poplar.
Poplar is inexpensive and my lumber yard carries many wide, knot-free boards.
I assembled each end of the base with dominoes. This allowed me to assemble each end quickly and accurately. Unfortunately, I only have access to the DF 500. As a result, I wasn’t able to easily create the large mortises for the long stretcher to join each side. The center column of each end is 3 1/2-inch by 3-inch and the DF 500’s fence just isn’t large enough to center a mortise on such a large piece.

In the end, I cut the mortises with a router jig. I cut the tenons for the long stretcher on the table saw and trimmed them up with hand tools. I’m not used to cutting tenons on pieces this long. Consequently, I moved a few tools around to create enough clearance for the stretcher as I ran it across the table saw.

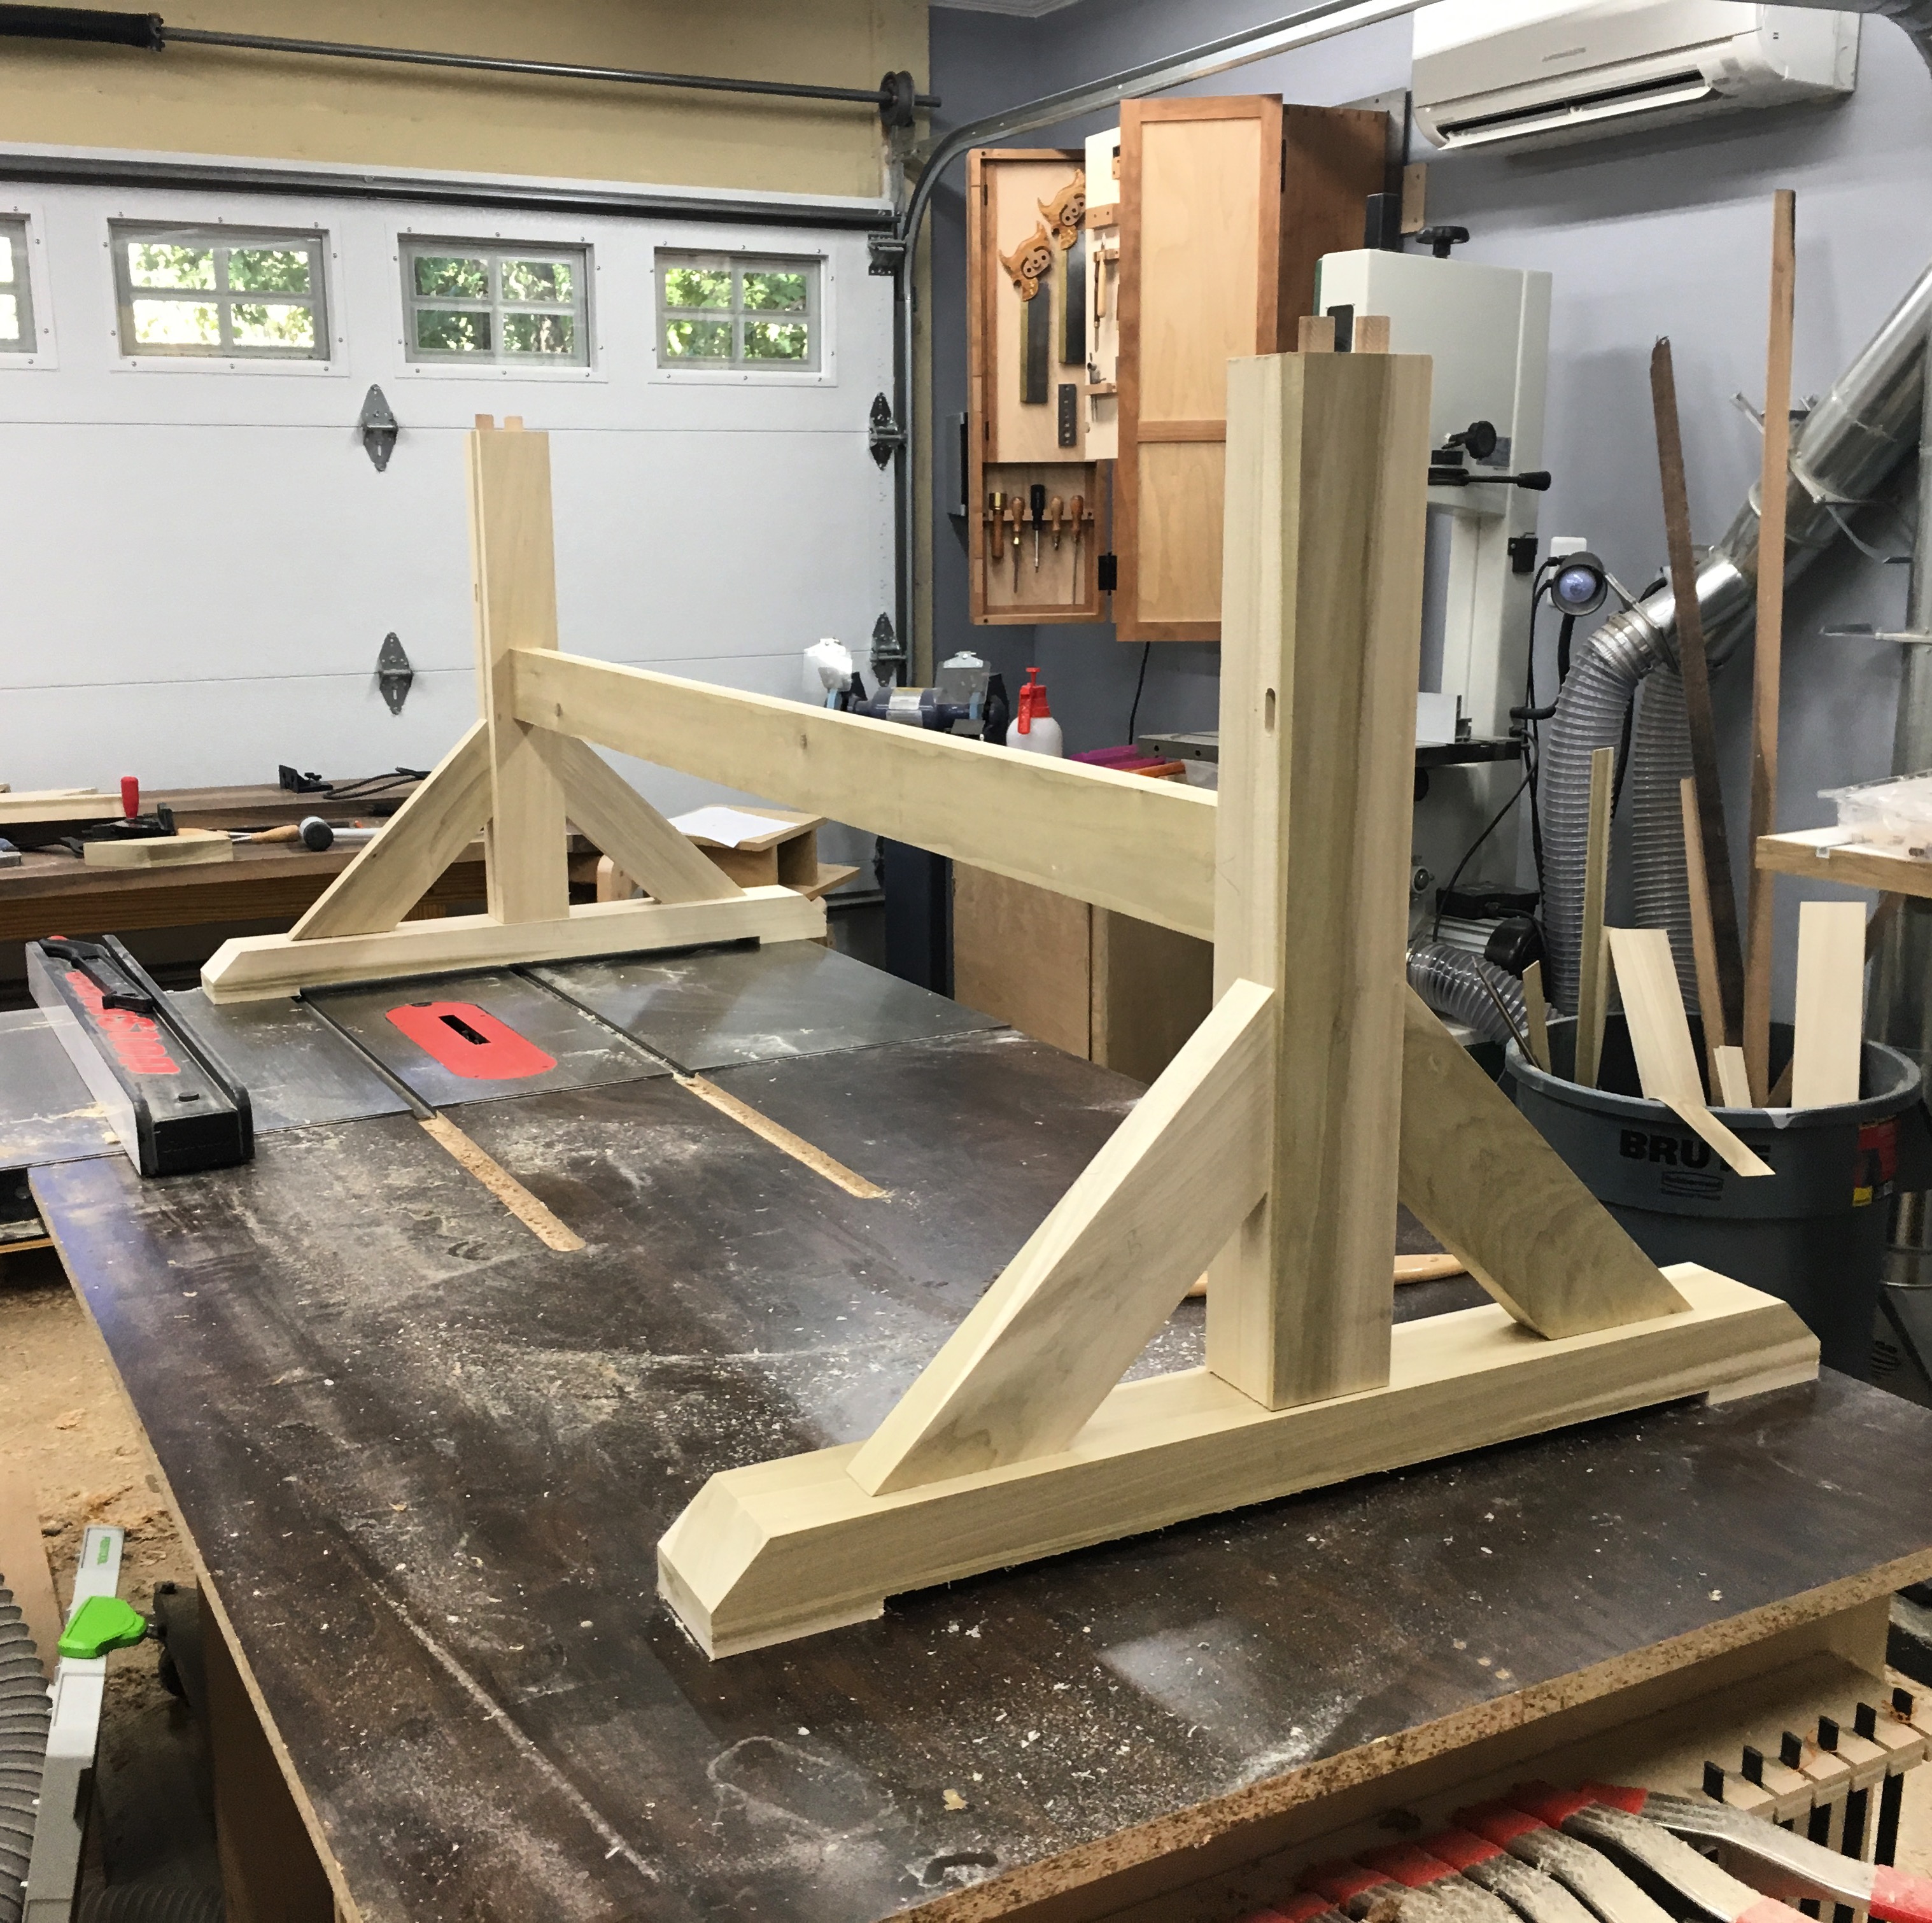
Before gluing anything up, I test fit everything together. You don’t want to run into any issues after you’ve applied glue. Then, I cut bevels on the short stretchers and use the dado stack to cut “feet” for the bottom stretcher.

Next, I glued each end together. I ended up only needing a single clamp per end.

Finally, I glued up the complete base assembly. Unfortunately, I don’t have any clamps long enough to secure the base. So, I drove everything together and ensured that everything was square. Then, I kept everyone away from it for the next hour. The base is stable enough to stay put unless someone bumps into it pretty hard.
With the farmhouse table base complete, the only thing left to do is secure the top to the base and apply finish. Into the home stretch!…
Click here for more on the Farmhouse Table Series
