
Dust Collection: Snap-lock Ducting
Snap-lock ducting offers a great compromise between affordability, durability, and ease of install. Fittings and adapters are easy to find locally and online. The only tools needed are a HVAC crimping tool and an offset tin shear. I purchased both for less than $25.
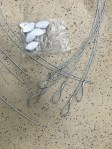
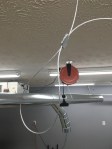
I am using Gripple’s Hang-Fast system. It makes hanging your ductwork a breeze. Simply, hang the loop on an eye-bolt or j-hook. Then, slide one end of your wire through the grip. Loop the wire around and insert it through the other end. It’s self-locking and can be loosened using a supplied key. I am very happy with this product and would use it again in a heart-beat.
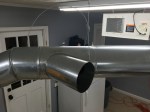
The straight pipe goes together easy enough. Cut the pipe to length using a pair of offset shears. Then, snap the seam together by starting at one end and working down towards the other. Once snapped together, it helps to drive a self-tapping sheet-metal screw near each end. You could also use pop rivets. Finish each section by crimping one end. The crimped ends should always point back towards the collector.
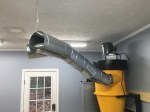


I secured each section and fitting using a couple of sheet metal screws and then sealed all the seams with clear silicon caulk.
I’m currently about two-thirds of the way complete with my ducting. Even with ample planning, it’s hard to know exactly what you’ll need until after you get started. I am short a few fittings and patiently wait for them to arrive.
Stay tuned.
For the rest of the workshop build, check out the garage workshop build index.
