
Sharpening: Honing Your Skills
by Patrick Harper - Blood, Sweat, and Sawdust

The most critical part of sharpening is the honing process. This is where an abrasive is used to bring an edge to a theoretical, zero radius. A mirror polish is secondary. The details of how you get there, aren’t important. What is important is that you get there quickly and efficiently. For example, I recently switched from using a fancy honing guide to a cheap pinnacle style guide. This has greatly simplified setup and reduced the overall time I spend sharpening. The change was a revelation. Just create yourself a series of stop blocks for commonly used angles and you’re ready to go. It’s so easy that I don’t really see much advantage to honing freehand.

The angle at which you choose to hone, will depend on the work being done. For general use, I hone to 30 degrees. If I were primarily paring, I might choose 25 degrees. Chopping and mortising might benefit from the durability of a 32-35 degree edge. I like to keep things as simple as possible, so I currently only use two stones: a 1000-grit Shapton and 15000-grit Shapton. The large jump between grits hasn’t been an issue for me yet. The extra time spent at the 15000 is offset by the time not spent at intermediary grits.
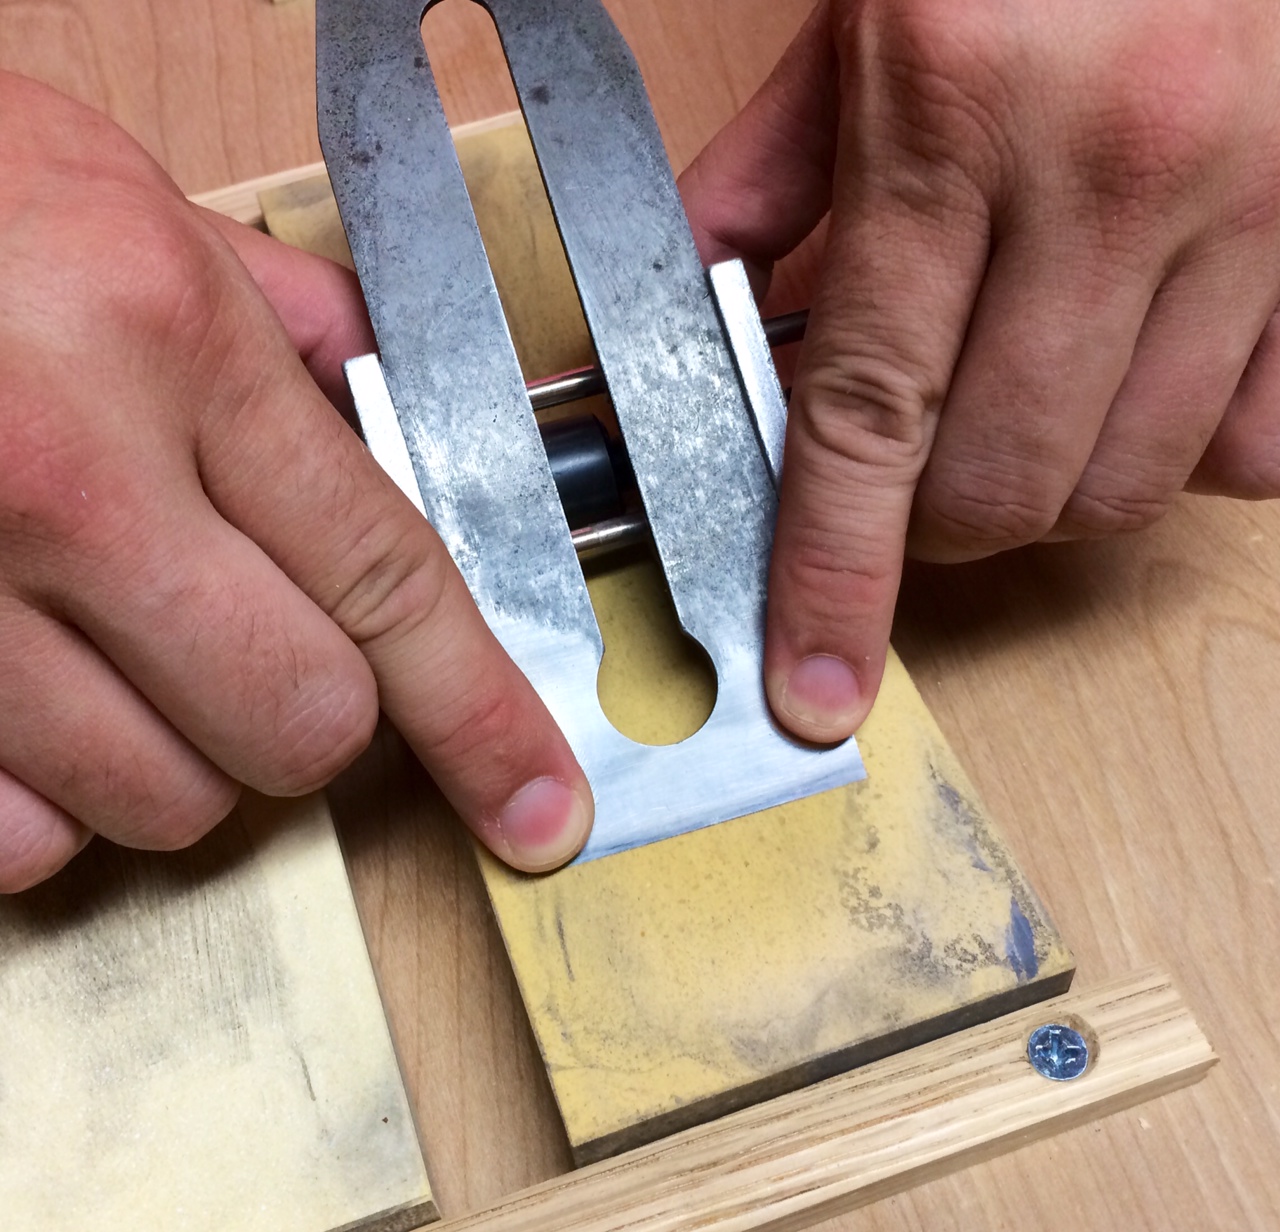
I start by securing my blade in the guide at the desired angle. I wipe down the edge and guide wheel, and proceed to my first stone. The Shapton’s only need a quick spritz of water on the surface and they are ready to go. I like to place my thumbs on the rear of the guide and my index fingers on the corners of the blade. It’s important to maintain consistent pressure between fingers. From there, it’s just a matter of drawing your guide back and forth across the stone until a burr is raised along the entire width of the edge.
You want to keep your secondary bevel as small as possible to reduce the amount of effort required to hone your edge. Therefore, I only continue until a burr is formed along the entire edge. With a 1000-grit stone, you should be able to feel this with your fingertip or fingernail. Don’t be tempted to remove the burr by hand.
If it’s taking too long to raise a burr, evaluate the primary bevel. One common problem is that the angle of the primary bevel is too close to the angle of the secondary bevel. Another common problem is leaving to large of a flat area after repairing a damaged edge.
Once you’ve successfully raised a burr, wipe off your edge and the wheel of your guide to prevent contaminating your next stone.

I begin on my fine stone by removing the burr from the back side of my blade. Then, I repeat the same process I used on my coarse stone. I find that it usually only takes me 10-20 swipes to remove the scratches from the previous stone. A burr will form, but it can be very difficult to detect at this stage. I end the process by removing the blade from the guide and giving the back a few quick swipes. If I’m sharpening a chisel, I leave it flat on the stone. If I am working with a plane iron, I might use the ruler trick. Once finished, I test the blade for sharpness.
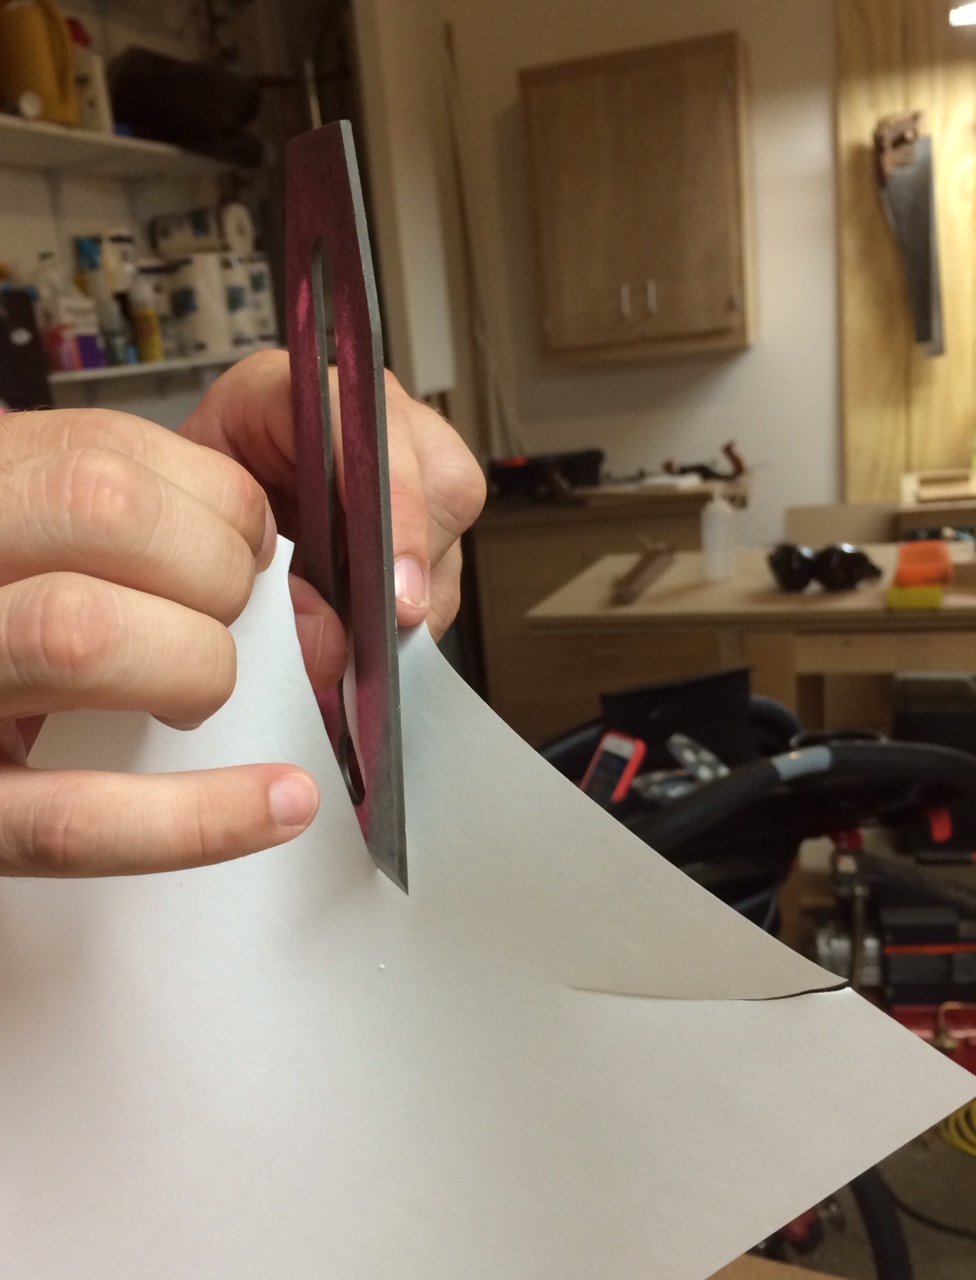
There are many quick and easy ways to test for sharpness. A sharp blade should easily slice a piece of paper with little more pressure than the weight of the blade. I sometimes test on the back of my thumbnail. A sharp blade will easily catch on the back of my nail under its own weight. Don’t forget to test the entire width of the blade. Carefully running the blade across the tip of my nail will quickly reveal any dull spots.
Don’t hesitate too long to rehone. A slightly dull blade takes much less time to hone than a really dull blade. Happy sharpening!
