Blood, Sweat, and Sawdust

Going against the grain

Tag: handtools

Better Winding Sticks

I built my first pair of winding sticks a couple of years ago.  Back then, I worked primarily with hand tools.  Today, I prefer power tools.  However, I still need a good pair of winding sticks.  Recently, I discovered just how poor my first pair were.  That sent me on a path to build better winding sticks.

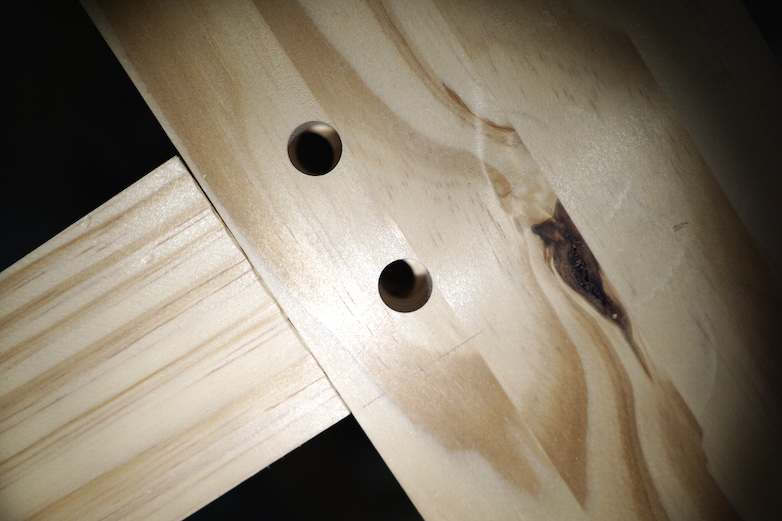
My old sticks suffer from poor visibility.  Consequently, I bored holes at the ends of one stick.  It turns out that the holes don’t quite line up.  Additionally, the sticks aren’t the same height.  All of this stems from the fact that I had limited tools and skills at the time when I built them.

Better Winding Sticks

So, I scoured the Internet for good ideas.  It turns out, there are quite a few.

  1. First, I picked up the idea to use quartersawn walnut, with maple inlay from Chris Schwarz.  This provides a lot of contrast for better visibility.
  2. Paul Sellers provided me with the idea to bore a hole through the center of each winding stick.  This allows you to easily center the winding stick on the board you’re checking.
  3. Finally, everyone seemed to use a beveled design.  I believe the benefits of this are two-fold.  First, it helps the winding sticks reflect more overhead light for better visibility.  Second, it increases stability by removing some of the weight at the top of each winding stick.

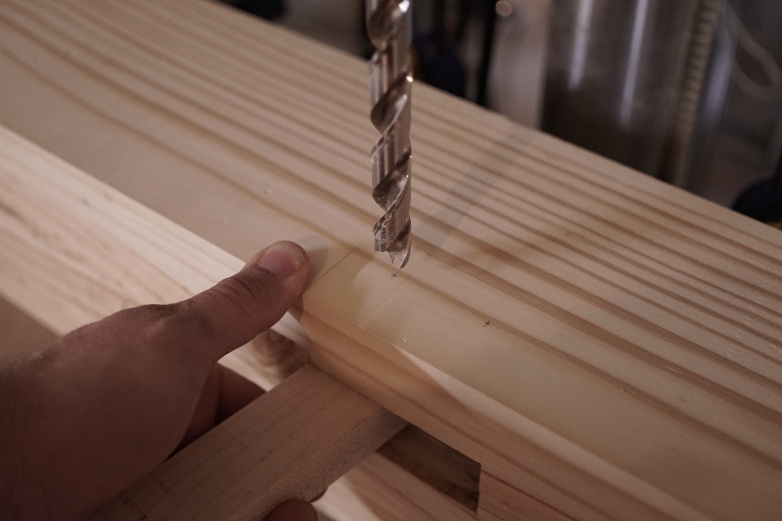
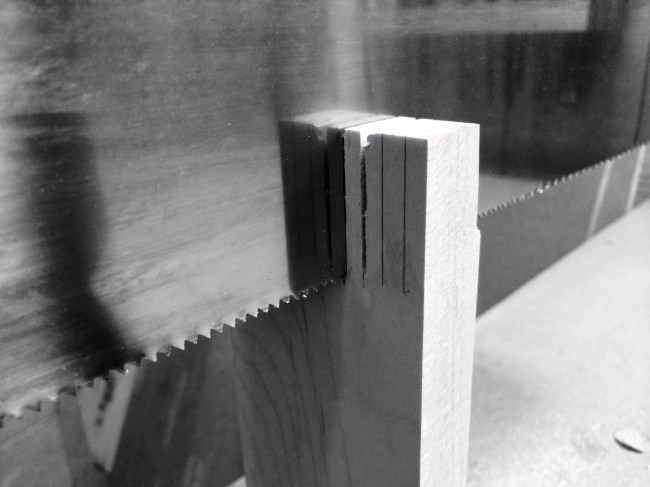
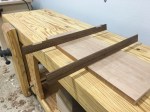
Next, I took a trip to the lumber yard.  It took some digging through the boards to find one that qualified as quartersawn.  In the end, I found what I was looking for.  I rough milled the board and let it sit for a few days to acclimate.  Then, I jointed the rough sticks and thicknessed them to 5/8-inch.  Next, I cut the bevel on the band-saw.  After cleaning up the bandsaw marks, I started work on the inlay pieces.  I cut these from some maple scraps I had lying around.  Then, I used the inlay pieces to mark their respective mortises.  I cut the mortises using a trim router, and cleaned them up using a chisel.  After gluing up the inlay pieces, I bored the holes at the drill-press.  Finally, I cleaned up the faces with a smooth plane and applied a couple of coats of tung oil.

I think the turned out well.  They’re much more accurate and easy to read than my old ones.  Additionally, the inlay turned out okay for my first try.  In conclusion, my attempt at making better winding sticks was a success.


A Hand Tool Cabinet: The Design

Ever since we moved, my hand-tools have been homeless.  Throughout the workshop build, they’ve remained hidden in drawers and boxes.  So, it’s time I give them a home.  It’s time I build a proper hand-tool cabinet.

A few years back, Mike Pekovich built a beautiful hanging tool cabinet for a Fine Woodworking video workshop series.  I fell in love with his design immediately.  Not only did I love the look, but I loved the creative use of space.  The doors are shallow boxes that allow for extra storage.  So, I downloaded the plans and hoped that I could make the design work for me.

Unfortunately, Mike’s design doesn’t fit my space.  An outlet and a few power tools limit the overall size of the cabinet.  Additionally, the stud locations require that the French cleat extends outside of the case(Mike’s is neatly hidden).  That’s okay because, I can use the longer cleat to hang other things.  With that discovery, I set out to modify Mike’s hand-tool cabinet to fit my needs.

The 4-plug outlet limits the space where I will hang the cabinet. The outlet is mounted to a stud just to the left. If I used the two studs to the right and hid the cleat inside the case, I would have to move it too far to the right. I wouldn't be able to open the doors.

My space is shown above.  The 4-plug outlet on the left mounts to a stud on the left side of the box.  To hide the cleat, I would have to move the cabinet so far to the right that I wouldn’t be able to open the doors.  Instead, I plan to hang the cabinet on an external cleat that passes above the electrical box.

The design above, is what I came up with. The case is a few inches narrower and shorter.  The back is one solid piece, and I will attach a French cleat directly to the back.

The next step is to build a mock-up, and make sure that the design works before purchasing lumber.  Fortunately, I think I have just enough 1/2″ plywood left over from previous projects.

Stay tuned.

Check out my next post in this series: The Mockup


Troubleshooting Holdfast Issues

After boring the first few holdfast holes, I realized that I had serious issues.  My holdfasts simply weren’t biting.  Often, they were jumping around in their holes.  I had to find a solution, and fast.

The bench top is 4-1/2 inches thick.  The holdfast holes are 3/4 inch in diameter.  I am using Gramercy holdfasts.  They are very well made, and should survive years of abuse.  I did some research and determined that the most likely cause was the thickness of the bench top.  How could I resolve this with the holes already bored?

I received some excellent advice from my friends on Twitter and decided that I would counter bore the holes from the bottom with a large diameter hole.  To center the holes, I inserted a piece of 3/4 inch dowel.  After some trial and error, I determined that the most effective nominal thickness was around 3 inches.  The holdfasts work beautifully.  The solution was quick and easy.

I need to clean up the surfaces and coat everything in boiled linseed oil.  Then, I will finally be able to start my first project on the Roubo.  Stay tuned

You can find links to my other Roubo posts here:  Project Index

IMG_5420

Holdfast in action

A Simple Trick for Boring Accurate Holes by Hand.

I’ve always struggled boring accurate holes with hand tools.  I’ve tried using the “CD trick”.  I tried try-squares and mirrors.  I get close, but sometimes close isn’t good enough.  That’s when I came up with this simple trick (I’m sure I wasn’t the first one to use it): a guide block.

I first came up with this while drilling the draw-bore holes through the side of my top.  I have a drill press, but there was no way I could get the bench-top under the press.  Now, I’m using it to start my holdfast holes.

auger bit with guide block

Here’s how I made it:

  1. Find a piece of scrap that’s at least twice as thick as your hole and long enough to accept a clamp on either side of the hole.
  2. Joint an edge.  This will be the bottom of your guide.
  3. With the jointed edge down, bore your hole roughly through the middle of the opposite edge on a drill press (the table must be square to the bit).

You’re done.  I marked arrows on all four sides of mine to remind me which way to orient the guide.  A wider piece will yield more accurate holes, but may be harder to clamp to your work piece.

Crisp hole with bit and brace


Dead-men Tell No Tales

Mother’s Day was this past weekend (I hope none of you forgot), and I’m on-call this week for my day job.  As a result, I haven’t gotten as much done on the workbench as I would like.  However, I did get a few things done.  I finished shaping the vise chop, and I roughed out the sliding dead-man.

Completed Vise Chop

I cut the vise chop to shape on the band saw and then jointed the edges.  Then, I attacked the bevels with my low-angle jack plane.  The bevels on the vise chop are a little tricky without some sort of guide.  You just need to watch your lines and adjust your angle of attack when necessary.  The Bench Crafted hardware is now permanently installed, it the action is sweet.  I really prefer the classic look to the more polished glide models.

Sliding Dead-man

With the chop complete, I started working on the sliding dead-man.  I picked the best looking board left, and milled it square.  I had trouble figuring out how I could cut the bevel on the bottom of the board.  I ended up cutting it very carefully on the band saw.  Then I cleaned it up with a chisel.  This worked surprisingly well.

With the bevel cut, I marked a line on the board where it met the top.  I measured down half the distance of the groove in the top, and struck a second line.  This will be the shoulder for my rabbet.  I cut the shoulder with a backsaw, and the cheek on the band saw.  From there, it was just a matter of tweaking the length of the tenon until I could get the bottom groove on the stretcher.  Next, I’ll clean up the curves and bore some peg holes.

Roubo Workbench

The only thing I have left to do is build a shelf and bore my hold-fast holes.  I’ve already been using the bench.  In fact, I used it to mill up the dead-man.

Stay tuned…

You can find links to my other Roubo posts here:  Project Index

Roubo Workbench Build: Draw Boring the Base

I did a lot of research while designing my Roubo workbench.  There are many ways to bring everything together.  However, my favorite approach was draw boring the mortise and tenon joints.  There is no need for any glue, and the joint should stay tight for ages.  As of my last post, I didn’t think I would be able to do this, but I found a way to work my issues.

For the unaware, a draw bored joint is when you drive a peg through a mortise and tenon to pull everything together.  The tenon hole is offset slightly towards the shoulder so that the peg pulls the shoulder tight when you drive the peg through the hole.

Bore your holes, using a piece of scrap to prevent blow-out.

Bore your holes, using a piece of scrap to prevent blow-out.

First, bore holes through the mortise walls.  It helps to use a piece of strap to prevent blow out on the other side.  I bored my holes to go at least one inch through the far side of the mortise.

Reassemble the joint

Reassemble the joint

Mark your tenons

Mark your tenons

Next, reassemble the joint and mark your tenons.  I used the same brad point bit, that I used to bore through the mortise walls.

Offset the holes on your tenons by about 3/32

Offset the holes on your tenons by about 3/32

Offset your marks towards the shoulder.  I used an offset of about 3/32 of an inch.  Bore your holes in your tenons and assemble the joint.

A close up of the draw bore offset

A close up of the draw bore offset

Here, you can see the offset holes.  When you drive the pegs, they will pull everything tight.  The pegs will actually deform and act as a spring.

Tapering the pegs help them start more easily.

Tapering the pegs help them start more easily.

I tapered the ends of all of my pegs to help them follow the correct path through the joint.  I also cut all of my pegs about an inch long, so that I could cut them flush later.

Legs pegged to the top

Legs pegged to the top

I assembled the entire base and drove the legs to the top first.  I used a large dead blow hammer to drive the pegs.  I tried to line up the grain of the pegs with the grain of the top, but the pegs all spun as I drove them.  There’s not much I can do about that.  I’ll just have to live with it.

I drove the pegs for the front stretcher from the rear

I drove the pegs for the front stretcher from the rear

Due to the thickness of the front stretcher, I ended up driving the draw bore pegs from the rear.  It worked out nicely.

A close up of the drawbored joints

A close up of the drawbored joints

Workbench draw bored together.

Workbench draw bored together.

Now that the base is finally complete, I just need to work out the details.  I have to flatten the top, bore holdfast holes, and finish the vise chop and sliding deadman.   Stay tuned.

You can find links to my other Roubo posts here:  Project Index

Sharpening: Honing Your Skills

photo 1

The most critical part of sharpening is the honing process. This is where an abrasive is used to bring an edge to a theoretical, zero radius. A mirror polish is secondary. The details of how you get there, aren’t important. What is important is that you get there quickly and efficiently. For example, I recently switched from using a fancy honing guide to a cheap pinnacle style guide. This has greatly simplified setup and reduced the overall time I spend sharpening. The change was a revelation. Just create yourself a series of stop blocks for commonly used angles and you’re ready to go. It’s so easy that I don’t really see much advantage to honing freehand.

photo 2

The angle at which you choose to hone, will depend on the work being done. For general use, I hone to 30 degrees. If I were primarily paring, I might choose 25 degrees. Chopping and mortising might benefit from the durability of a 32-35 degree edge. I like to keep things as simple as possible, so I currently only use two stones: a 1000-grit Shapton and 15000-grit Shapton. The large jump between grits hasn’t been an issue for me yet. The extra time spent at the 15000 is offset by the time not spent at intermediary grits.

photo 4

I start by securing my blade in the guide at the desired angle. I wipe down the edge and guide wheel, and proceed to my first stone. The Shapton’s only need a quick spritz of water on the surface and they are ready to go. I like to place my thumbs on the rear of the guide and my index fingers on the corners of the blade. It’s important to maintain consistent pressure between fingers. From there, it’s just a matter of drawing your guide back and forth across the stone until a burr is raised along the entire width of the edge.

You want to keep your secondary bevel as small as possible to reduce the amount of effort required to hone your edge. Therefore, I only continue until a burr is formed along the entire edge. With a 1000-grit stone, you should be able to feel this with your fingertip or fingernail. Don’t be tempted to remove the burr by hand.

If it’s taking too long to raise a burr, evaluate the primary bevel. One common problem is that the angle of the primary bevel is too close to the angle of the secondary bevel. Another common problem is leaving to large of a flat area after repairing a damaged edge.

Once you’ve successfully raised a burr, wipe off your edge and the wheel of your guide to prevent contaminating your next stone.

photo 5

I begin on my fine stone by removing the burr from the back side of my blade. Then, I repeat the same process I used on my coarse stone. I find that it usually only takes me 10-20 swipes to remove the scratches from the previous stone. A burr will form, but it can be very difficult to detect at this stage. I end the process by removing the blade from the guide and giving the back a few quick swipes. If I’m sharpening a chisel, I leave it flat on the stone. If I am working with a plane iron, I might use the ruler trick. Once finished, I test the blade for sharpness.

photo 3

There are many quick and easy ways to test for sharpness. A sharp blade should easily slice a piece of paper with little more pressure than the weight of the blade. I sometimes test on the back of my thumbnail. A sharp blade will easily catch on the back of my nail under its own weight. Don’t forget to test the entire width of the blade. Carefully running the blade across the tip of my nail will quickly reveal any dull spots.

Don’t hesitate too long to rehone.  A slightly dull blade takes much less time to hone than a really dull blade.  Happy sharpening!

Sharpening: Regrinding a Bevel

securedownload-2

Keeping your tools sharp is paramount to enjoying the time you spend in your shop working wood.  This is even more important to those of us who have limited time to spend in the shop.  If you’re like me, you enjoy building furniture more than you enjoy sharpening your tools.  The best way to minimize the time you spend maintaining your tools is to have a solid game plan and become as efficient as possible.  The only way I know to accomplish this is through practice.

For me, the first step in the process is determining whether a tool needs to have its primary bevel reground, and that is the topic that I want to explore today.  Whether from edge damage or a secondary bevel that’s grown too large, you’ll eventually want to regrind your bevels.  I find that the quickest way to do this is with a hollow grind using a benchl grinder.  Below I will describe the process that I use on my 8″ low speed grinder.

securedownload-3

Here, I have determined that the edge of this chisel is damaged and no longer square.  I start by using a square and a sharpie to mark a reference line just shy of the damaged area.

securedownload-4

securedownload-5

Next, I position my tool rest roughly perpendicular to the wheel and grind to my line.  This will leave a flat spot that is square to the sides of the blade.  Use a steady side to side motion until you reach your line.

securedownload-1

Once I have a square edge, I reposition the tool rest to the desired bevel angle and carefully grind until the flat area is almost gone.  For general work, I prefer a 25 degree primary bevel.  Keeping a small portion of the flat area makes it easier to avoid overheating which can remove the temper from the blade.  However, you don’t want to leave too much, or honing might become a chore.  If I were simply regrinding a dull edge, I would keep a sliver of the secondary bevel, as this also reduces the amount of time spent honing the edge.

Here are some key points to remember:

Always keep the tool square to the wheel unless creating a cambered blade is the desired result.

Apply consistent pressure to the tool when moving across the wheel.

Move your tool across the wheel at a steady speed.

Always dress your wheel before grinding.  I find that rounding the corners of the wheel slightly help with transitioning the blade across the wheel.

You’ll know you’re on the right track when you can consistently produce a new bevel that consists of a single facet across the entire face of the blade.  My next post will detail the honing process.

Handtool Basics

I’ve been meaning to spend more time developing my hand tool skills, and I thought it would be a great opportunity to write about the process. I find that the writing process helps me obtain a deeper understanding of the topic being discussed. Hopefully, it will provide insight to someone else along the way.

I plan to start with the basics and progress to more complicated tasks. I will include everything from sharpening and milling to joinery. I will detail my process and include lots of photos. My goal is to blog atleast one post per week regarding the topic. So, follow along and join in. I would love to hear your questions and suggestions.

Only Perfect Practice Makes Perfect

Image

Some say that practice makes perfect. A wiser man will tell you that only perfect practice makes perfect. So if you’re having problems with any of your hand tool skills, get out there and practice perfect practice. Now, say that three times fast.

Don’t wait until you start a new project to attempt a new skill for the first time. Find some scrap lumber and practice first. Take your time, focus, and perfect your technique before putting it to use on exotic lumber.