Blood, Sweat, and Sawdust

Going against the grain

Hath Hell Frozen Over: Cooling a Windowless Garage Part II

LG portable air conditioner

It seems that way…for now.  I would love to install a ductless mini split in the garage.  I have a limited budget, so I figured I would give a small portable air conditioner first.  If it doesn’t adequately cool the space, I will return it.

So far, it is working pretty well.  It cooled down the garage from 82 degrees to 75 degrees in a couple of hours.  I will insulate the exhaust hose, which will make the small unit more efficient.

portable air conditioner exhaust hose

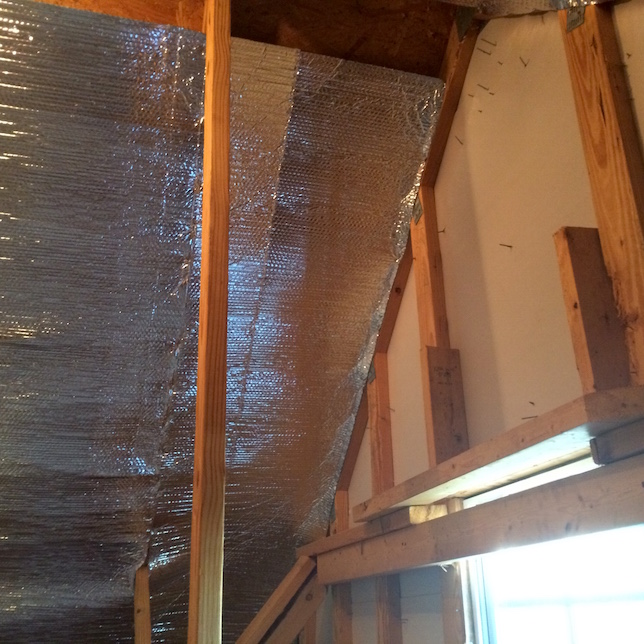
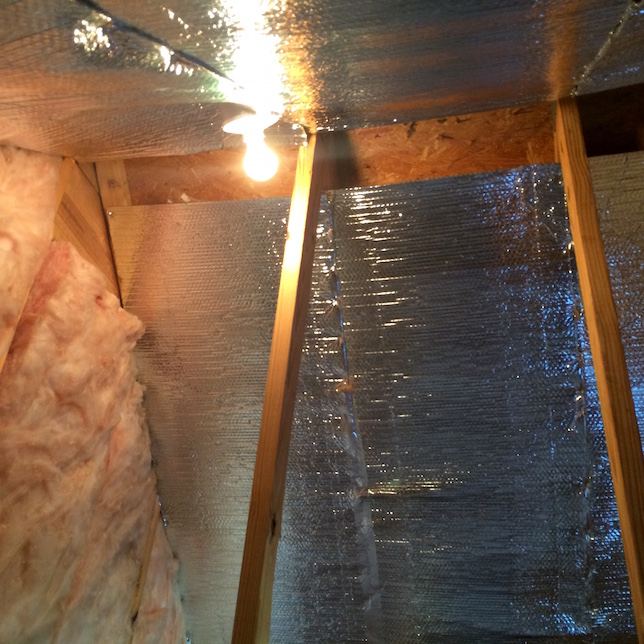
Speaking of the exhaust hose.  I decided to exhaust it into the small attic space above the garage.  I purchased a 6-inch dryer vent and some 6-inch flexible duct work.  I cut a hole through the drywall and connected everything.  It took less than half an hour.  As you can see, my drywall skills need some work.

The weather is cool at the moment.  Highs are only in the mid 80’s.  I will have to wait until next week to see if this small LG portable air conditioner can keep up.  At the very least, it blows a nice cool breeze across the workshop without disturbing too much dust.  I will be happy if it can get me through the rest of this summer.  Perhaps I can save up for a mini-split by next spring.

Click here for my first post about cooling a windowless garage


My Own Private Hell: Cooling a Windowless Garage Workshop

The heat really has me down.  This past week was a scorcher.  Fortunately, the air was cool this morning.  So, I got up early and finished installing the radiant barrier in the small attic above the garage.  Time will tell if this offers any really benefit.  The forecast for the next few days is cooler.

Last week I took a few temperature readings with my infrared temp gun.  I took all readings at 4pm on a sunny day with temps in the mid nineties.  The ambient temperature was around 85 degrees in the shop.  Not terrible, but enough to have me sweating profusely when doing any handwork.  The relative humidity was around 70%.  The interior walls all read around 80 degrees, but the ceiling near the attic space read 95 degrees.  This has convinced me that the attic space is contributing to the heat in the garage to some degree.

This piqued my curiosity, so I took a few readings in the attic space.  The ambient temperature was around 110 degrees.  What surprised me was that the attic ceiling read  135 degrees.  I bought 3 rolls of Reflectex radiant barrier insulation the next day.  I ran out of the reflective tape, so I still need to finish taping up the seams.  As soon as I get another hot day, I will take another round of temperature readings, and report back.

Installation of the radiant barrier is straight forward.  It’s sold in various widths that correspond to common spacing of your rafters.  You simple staple it between two rafters, every 6 inches or so.  The instructions said to leave a 3-6 inch gap at the top if you have a ridge-line vent.

I’m hoping that this will lower the ambient temperatures in the garage by about 5 degrees.  The other factor contributing the my discomfort is the humidity.  I plan to buy a dehumidifier or portable AC with dehumidifier.  The portable units aren’t the best, but I think a 12000 btu unit could cool my insulated garage down to 75 degrees.  I would consider a minimalist, but I just don’t know how much longer I’ll be in this house.

What have you done to cool down your shop?

Cooling a windowless garage in the southeast ain’t easy.

Radiant barrier for cooling the windowless garage

cooling a windowless garage

Click here for part II: cooling a windowless garage with a portable air conditioner.

Better Hand Plane Storage

Plane Till

For the past year, my hand planes have sat on a little mobile cabinet near my work bench.  Here, they collected fine dust from my electron powered machines.  It wasn’t until after the weather started getting hot and humid again that I started to notice a few specs of rust here and there.  It was nothing that I couldn’t easily remove, but it got me seriously reconsidering my hand plane storage.

The goal is to create a nice hanging tool cabinet with doors, but it all starts with a plane till.  For now, the till will be hung on the wall using a french cleat.  Later, I will fasten it to the inside of the tool cabinet.  It only took about $25 and a few hours to finish.  It won’t be a huge loss if I decide to redesign it for the finished tool cabinet.

The ramp angle is fairly steep to save depth.  I will better secure the planes before mounting it to the wall.  I’m having a hard time between trying magnets glued to the back to the till ramp, or cleats.  Cleats are more secure, but less attractive.  What do you think?  Any options I haven’t considered?

French Cleat

Empty Till Web

I’ll detail the tool cabinet in a future series.  Mike Pekovich’s hanging tool cabinet formed the inspiration for this project.

I haven’t finalized the details, but I’m thinking that I will build it out of cherry with mahogany door frames.  Stay tuned.

This Place Gives Me Wood

…or will in the future.

I’ve heard great things about the guys at CAG Lumber many times over the past couple of years.  They’re located just a few miles away from my day job.  I’m not quite sure why I haven’t visited them until now.  Maybe, it was because I had another lumber yard just miles away from my house.  Maybe, it was because they’re in the opposite direction of my commute.

Whatever the reason, I decided to finally give them a visit during my lunch break yesterday.  I’m glad I did.  The staff is friendly and helpful.  They stock exotic species I haven’t found anywhere else.  Looking for spalted, wormy, or quilted boards?  They’ve got them.  They even stock reclaimed lumber.  They’re prices are fair, and the quality of their boards exceeds that of the other local suppliers.

One of my favorite aspects of their operation is that they stack all of their boards horizontally, and label the length on the end.  It’s pretty easy to locate boards of a desired length without removing everything from the stack.

If you live within a couple hours of Gainesville, GA, I highly suggest you give CAG Lumber a visit.


Putting the Sweat into Blood, Sweat, and Sawdust

Temp Gun

The heat has been unforgiving.  I have a new appreciation for a good rust removal strategy, as I am constantly sweating on my nice hand tools.  I am careful to keep the refrigerator stocked with ice-cold beer.  The sheer amount of cold beer consumed is straining the budget.  I have to find a way to cool my muggy workshop; one that doesn’t break the bank.

I’ve been using my infrared temp gun to track any possible sources of heat infiltration.  Most of the garage is well insulated, but there is a small uninsulated attic space towards the front of the garage.  It happens to face south, so I this is my main suspect.  I plan to buy a few rolls of radiant barrier for the roof and south-facing wall.  I will report back.  Hopefully, this will help someone else suffering a similar situation.

I would love to buy a small mini-split, but I’m not sure how much longer I will be in this house.  What have you done to cool your hot shop down?

Stay tuned.

How to Use a Sector

The sector is an excellent tool for proportioning your furniture designs quickly and accurately.  Last week, I showed you how to make a sector from an old folding rule.  I also discussed how to use it.  Despite its simple nature, I thought this discussion could benefit from some visuals.

How to Use a Sector

Align the sector

1. Start by aligning the sector with the edges of the space you are dividing.  Since I am dividing the space into 4, equal segments, I align it with the number 8 mark.Align a divider with the sector

2. Next, without adjusting the sector, align a divider with the proper marks.  In this case, it is the number 2 mark.

IMG_5854

3. Next,  walk off your divisions with the divider.

IMG_5855

That’s it.  Four perfectly spaced divisions.  And, it only took a few seconds to complete.  No complicated math.  Simple.

If you have any questions, don’t hesitate to let me know in the comments.  Now, go out there and find yourself an old folding rule.


Make a Sector from an Old Folding Rule


The Sector

How do you quickly divide an interior space of 17 5/8 inches into three equal parts?  With a sector.  Furniture builders and architects have reached for the sector often to quickly divide spaces.  Unfortunately, it’s a tool that has been largely forgotten in today’s machine driven world.

The sector is nothing more than a pair of folding arms used to create a series of proportional triangles.  To divide a space, line up the sector with one of the markings that is a multiple of the division you want.  For example, if you want to divide the space into four equal parts, you could use the four, eight, twelve…you get the point.  Then, just set a pair of dividers to the division you want.  If you selected twelve, align your dividers with the three.  If this isn’t entirely clear, don’t worry.  I will write another post detailing their use.

IMG_5763

To make the sector, start by marking the center point of your hinge, where the inside of each arm intersect.  I used an accurate straightedge to carry a line through with a pencil.  It’s critical that this is accurate.

IMG_5764

Then, walk your increments off with a pair of dividers.  You may have to use some trial an error here.  Twelve increments works great, due to the amount of whole number ratios you can get.  Unfortunately, my first step would have still be in the brass, so I went with eight for this one.

IMG_5765

With the increments stepped off, I carefully carried a line across both arms with a marking knife.

Completed Sector

From there, it was just a matter of filling in the lines for visibility and numbering my graduations.  Stay tuned for part two, where I will demonstrate the sector in use.

Click here for part 2 in this series: How to use a sector

If Only You Could Hammer Out All of Your Problems with a Mallet

Beech Joiners Mallet

The last few weeks were crazy.  The whole family was hit by a stomach bug.  The water heater died.  I locked my keys in the car.  I could add more, but I’ll try not to depress you.

We did make it through, and we’re all a bit stronger for it.

After completing the Roubo, I’ve spent a lot of time cleaning up shop.  There was a lot of pine scrap to remove.  Additionally, I recently acquired a bunch of very nice beech.  Unfortunately, I had to take the good with the bad.  As a result, I had a lot of beech scraps and nowhere to store it.  The shop is now relatively clean, and I can get back to work.

The first order of business was to make a good joiner’s mallet.  Beech is good for mallets.  Why not?  Why make one mallet when you can make two?  I’ll be giving one away in the next week or two.  For details, follow me on Instagram.  There is a link in the top right-hand corner of the page.

IMG_5696

IMG_5699

I’m Officially a Craftsy Contributing Author

Craftsy Article

It’s official.  I am a contributing author for Craftsy.com.  Craftsy contacted me a few months ago and asked if I would be interesting in writing for their woodworking blog.  It was an excellent opportunity for me to gain exposure for my own blog, so I said yes.  It’s also an excellent opportunity to gain the experienced advice of their editors.

You can check out my first post here: Three Simple Workholding Solutions for Hand Tools

I’ve already submitted a couple of additional articles that should be published in the following weeks.  Let me know what you think.

Roubo Workbench Build Complete

They say that the journey is more important than the destination.  I agree.  However, it’s hard not to get excited about knocking this off of the list.

After some deliberation, I decided to finish the workbench with boiled linseed oil.  I found that the best way to apply the finish was with a squeeze bottle and a rag.  The bench will sit on an unprotected garage floor, so I don’t want it to wick up moisture.  It doesn’t feel much slicker than before and it looks pretty.

It was a long journey, but I learned a lot along the way.  The joinery on this thing is massive.  That alone was a challenge.  Milling the boards by hand taught me a lot about wood and how to use hand planes.  This was also my first time draw-boring a wood joint.  I definitely think I’ll be using this technique again in the future.

The bench is solid.  I absolutely love the Bench Crafted hardware.  I can’t wait to get started using this beast.  Thanks for everyone’s support and advice.

You can find links to my other Roubo posts here:  Project Index